 I have always loved the 80's. No one can tell me that things were not hip and cool back then. I loved the fashion, the make-up, the music. And I completely fell in love with those carved rugs that I first saw in the US in the 80's. They were magical. I had never seen anything like it. I didn't easily confess to this liking, being a design student known to love the Bauhaus movement and modern Italian design. Black leather and chrome were my thing, so the carved rugs were a bit of an anomaly.
When I saw the carved rug at the thrift store, I didn't hesitate one minute. Green, pink, peach, yellow and cream! My colours! I threw my arms around it to claim ownership. No one fought me for it. The same happened with the headboard. It was just sitting there, that relic of the 80's, priced at four dollars and I knew it was coming home with me. Except the difference was that back in the 80's I would have made rude gagging noises at the sight of it. I used to know middle aged women who actually paid good money for something like that. And they usually chose that dusty rose colour. So naturally I fell completely in love with it. How can one not love something so unapologetically cute. I must have been a little old lady in a former life.
| The rug was relatively clean, but the headboard was fithy, so I planned to remove the fabric and replace it with something new. The fabric that was on it was a type of velvet, but polyester. Not my thing at all. |
|
| So I set about to remove the cover. Removing staples at the back can be done with a special tool that upholsteres use, a staple remover. They can be bought at upholstery suppliers for about 25 $ and are easier to use. I used a screwdriver, just pried it into the board under the staple and janked the staples out. |
|
| Once all the staples were removed I set about to remove the buttons. These were actually with nails at the back. In order to remove them, I had to straighten the nails out at the back first. I used an old chisel and hammer to get under the nails and bend them up. Do not sacrifice a good tool for this job. |
|
| The buttons were pretty tight, but I managed to use a hammer to get them out. |
|
| Under the buttons I found at least two staples in each hole. Those would have made it easier to hammer the buttons in originally. By this time I was thoroughly sick of staples to I simply pulled the fabric and the staples popped out. I wasn't particularly careful with the fabric since I intended to throw it away, but it held up so well that I decided to toss it in the washer and see if it would come clean. |
|
| It washed beautifully, although the creases of a few decades remained. It looked so good after I washed it that I decided to use it again, provided I could reattach it. Usually, when upholstering, one cuts the fabric quite a bit larger than needed and then trims it tight. So I knew that I would have very little fabric to pull at the edges. |
|
| Starting from the middle, I began by stapling the fabric to the board where the buttons were to come, trying to fold the fabric fairly neatly. It was easier to place the fabric correctly than I thought it would be, because I had the old creases still in the fabric to guide me. |
|
| Onve I had staples the fabric in every hole and arranged the fabric it folds I hammered the buttons in. The nails at the back of them were not straight anymore, but it didn't seem to make much of a difference. I managed to get all of them in and they didn't look noticeably crooked. |
|
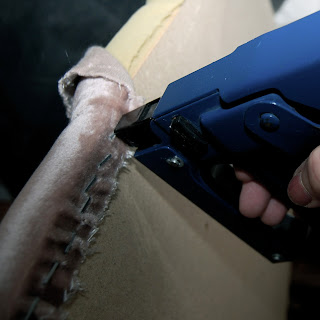
| Then the challenge was to pull the fabric tight all the way around and arrange it carefully in the creases to make sure it didn't bunch. I know that I didn't do this as tightly as the professional upholsterer did originally, but it looks good enough for me. |
|
| I managed to get the fabric staples all the way around. I was quite surprised that the fabric didn't unravel more in the wash. |
|
| The finished product. Not a tight as the original, but I just think it looks more friendly. |
|


