Monday, December 30, 2013

Lavender - Last One of the Year

I just had to make a Lavender soap if only for the Grandmothers.  I don't dislike Lavender, but it's not a great personal favorite, but I know that many people really love it.  That includes the family's grandmothers.

I continued with a similar recipe to the ones I had already made, determined to use both Lanolin and Jojoba, but this time I also remembered the Cocoa Butter that is sitting on a shelf in kitchen.  Since I don't have steady supply of lard, I thought it would be a great addition to the recipe to make the soap harder.  I also had some Shea butter that I added to it.  One of the grandmothers loves that.

For colour I turned to the Alkanet infused oil that I have, lovely and dark red, ready to give it's blue to purple colour as soon as it comes in touch with the alkaline caustic soda. I never tire of the colour magic that soap making is.

I made these big generous chunks of soaps and the recipe turned out to be:

Olive Oil - 40% - 7oz / 200g (80g of that was Alkanet infused)
Coconut Oil - 30% - 5.3oz / 150g
Cocoa Butter - 10% - 1.8oz / 50g
Shea Butter - 10% 1.8oz / 50g
Sunflower Oil - 5% - 0.9ox / 25g
Lanolin - 2.5% - 0.45oz / 12.5g
Jojoba Oil - 2.5% - 0.45oz / 12.5g

I used water with a teaspoon of sugar.  And to continue the theme I decorated with Achillea flowers, Lavender flowers and Birch leaves.

The grandmothers got their soaps for Christmas. One of them remarked that the saves hers for special occasions and was just running out.  It pleased me that she would get a new one.  But this year, rather than give soaps as presents for christmas, I had people choose some to take with them when they left the Christmas dinner.  I still have enough left for me and plenty of soaps begging to be created in the New Year, among them a Vanilla soap and there is is definitely a Yellow one on the horizon.

Happy New Year and very best thanks for the one about to pass.

Monday, December 16, 2013

The Cream of the Crop

I had a vision of the lightest creamiest soap since I knew I had some whipping cream in the freezer. I had put it there a long time ago, anticipating a soap making session in a distant future.  When making milk soaps one needs the milk/cream/yoghurt to be frozen, so when I had some cream that I didn't need, I threw it in the freezer knowing that one day I would be grateful for my foresight.

I decided that it would smell soft and gentle.  The inspiration was a soap that I made some time ago, but that was unscented and now I had vanilla in mind.  Since vanilla makes soap brown I couldn't use that. Bensoin resin is a favorite of mine and an acceptable substitute because it is quite a sweet scent.  I also thought of Ylang Ylang.

I have used Titanium Dioxide in my milk soaps before, but decided to do without that this time and take my chances with the colour.  I was careful to mix just a little bit of the Caustic Soda with the frozen cream, using a quarter at a time, and throwing the whole thing into the freezer in-between.  As expected the whole thing turned a strong yellow colour and that made me reach for the dried yellow rose petals to use for decoration.
This was a pretty complicated mixture of oils and waxes. I'm still intrigued by lanolin in soap and wanted to test that better.  I also really like to have some castor oil so that it doubles as a shampoo bar.  And the Jojoba... Well, I had some.

Olive Oil            40% - 7oz / 200 g.
Coconut Oil       35% - 6.2oz / 175 g.
Cocoa Butter     10% - 1.8oz / 50 g.
Sunflower Oil    10% - 1.8oz / 50 g.
Jojoba Oil            2% - 0.35oz / 10 g.
Castor Oil            2% -  0.35oz / 10 g.
Lanolin                1% - 0.18oz / 5 g.

Water  5.8oz / 200 g.
Caustic soda 2.4oz / 68 g.
10% superfat

I mixed Bensoin, Neroli and Ylang Ylang with a little bit of Sweet Orange and Sandalwood Amyris. Decorated with yellow Rose petals, Chamomile, Achilla and Birch leaves.  The soap started to seize pretty quickly so I jammed it into the mold and then I put it in the freezer to prevent it from overheating.  I smells wonderful.  It doesn't look as good, some strange thing going on in the middle, but I look forward to testing.  This one will probably also only be for me.

Sunday, November 24, 2013

This One's Just for Me

I made this very strange recipe.  I have no idea how it will turn out at all.  I knew I wanted to use lard.  I don't use palm oil mostly because I can't find it here and lard makes for very good hard soaps.

I also wanted to use up some oils that I had a little bit left of. Additonally I wanted to make soap just for myself.   Something luxurious and pretty.   A soap that I would use on my face, and therefore I wanted all those exotic oils that I normally would use in face creams rather than soap.

So it became quite a cocktail.  I'm still waiting to see how it will turn out.  It just might be an almighty flop.  But it could also become my new favorite soap.

I know this is a crazy recipe. It's not supposed to be very conditioning, but since I used both jojoba oil and lanolin, both of which really are waxes rather that oils, I'm counting on them to do the job. Plus this is more superfatted than I usually do.

The thought with this soap (if there was any, I did this pretty instinctively) was to make something similar to my old facial soap that I did ages ago. That soap seemed to take forever to cure, but turned out to be one of my all time favorite soaps. And that one aged quite well too.

Coconut Oil - 36% - 5 oz / 160 g
Lard - 30% - 4.7 oz / 134g
Almond Oil - 17% - 2.6oz / 73g
Avocado Oil - 10% - 1.6oz - 45g
Olive oil (Rubarb root infused) - 3.5% - 0.5oz / 15g
Castor Oil - 1.8% - 0.3oz / 8g
Jojoba Oil - 1.6%% - 0.25oz / 7g
Lanoline - 0.5% - 0.1oz / 2g

Water - 5.2oz / 66g

Lye - 2oz / 58g which makes it 15% super fatted, but always check a lye calculator (I always use Soapcalc myself).

For fragrance I used Neroli, Ylang Ylang and Benzoin, with a dash of Rosewood, Sweet Orange and a dash of Geranium, Vetiver, Sandalwood Amyris and Cubea Litsea.   I put it in this silicone cake form that I got in a thrift store (and have never used for cake) as well as my heart shaped ice cube mold from Ikea.   I like to have small soaps for the bathrooms.

The scent is nice and fresh and the colour also turned out to be a very nicely pink.   But this soap is also going to take a lot of curing.   Oh, well. Patience is the mother of all virtues, as they say.   I need more of that, and as they also say: Practice makes perfect.  So it's all good.

Update: Like I expected, this soap took some time to cure, but once it did it does make for a nice very creamy lathered soap that feels quite gentle on my skin.  I have also used it as a shampoo bar and my hair likes it.  The fragrance didn't hold up as well as I hoped.  It turned into a kind of indistinct something.  So even if I like that Neroli, Ylang Ylang and Benzoin combination I should probably have skipped the others or made one of them dominant.

Monday, November 11, 2013

Making Soap My Way - A Tutorial Of Sorts

I made soap again.  Just suddenly got the urge and then I thought I should document my process.  I never did a tutorial before.  Mostly because when I started this blog I was a complete beginner in soap making and I was reading other peoples tutorial to learn from them, not ready to teach others.  But now that I have become pretty seasoned in soap making, I thought I should write down my steps.

I have always made soap in the kitchen using my regular pots and kitchen stuff.  I have read a lot of books about making soaps and most of them are very good and thorough, but sometimes I feel that they make it sound so difficult and complicated.  I like things to be easy and simple.  So my favorite book about making soap is by Anne Watson "Smart Soapmaking" (even if the subtitle is a bit more complicated: "The simple guide to Making Traditional Handmade Soap Quickly, Safely, and Reliably, or How to Make Luxurious Handcrafted Soaps for Family, Friends, and Yourself".  I love the humor in that).  She gave me the courage to go ahead and try it.

Over time I have developed my own way to do things and I have gotten pretty set in my ways.  I always use the same equipment: same pot, same glass measuring jugs, same spoons, same everything.   Except the recipes.  I just can't make the same recipes again and again.  I always need to tweak them a little bit, at least.  And now suddenly, I have a need to make soaps.  There are a few that are asking to be made.  I have sometimes wondered what kind of soap I would make first.  Once I started again.  It was Rhubarb oil soap.  A very strange recipe, if I'm honest.  I have no idea how it will turn out.  Might be a total failure, although I thought of it as a luxurious face soap.  But that is another post.  This one is about the process.

My equipment consists of:
  • A pot - I use that for the water/liquid and to dissolve the caustic soda
  • A large pyrex class measuring jug with a handle - That is for the oils
  • A small pyrex class measuring jug with a handle - This one is for the caustic soda
  • ---I do not use the measuring jugs to measure, just as containers---
  • A slotted spoon - to stir the caustic soda solution
  • Two thermometers - one for the soda and one for the oils
  • A digital scale - to measure everything
  • A stick blender - to mix everything
  • Moulds
  • And the most important equipment of all is my computer... and SoapCalc www.soapcalc.net/.  I use that for every single recipe and save them as pdf.  
  • And then there is the camera, or the phone these days.  (Which I know isn't good because the photos are not nearly as good as on a proper camera.  But I have gotten a bit lazy.  I need to change that.)
I put my recipes straight into SoapCalc as I work.  I usually make either 500g or 700g depending on which mould I'm using.  I put in the total weight and my preferred water ratio (usually about 33% these days) and super fat % (varies from 5-10% usually).  I would recommend that beginners stick to the default setting in the beginning.

I would also recommend goggles and gloves and an apron.  Lye is very caustic and it does burn.  The raw soap is also very caustic and it does burn.  You do not want to splash this stuff on yourself and definitely not get it into your eyes.  Having said that, I have to admit that the hazmat-like outfit that I wore in the beginning has given way to a bit lighter safety gear.

Before I do anything else I get my mould ready.  I like the wooden moulds with freezer paper. But one can use silicone moulds (for baking) and just about anything that has a shape resembling soap.  In the beginning I used milk cartons and yoghurt pots.


Then I start measuring the oils one by one, resetting the scale after each time.

Sometimes I pour a little bit more than I intended and then I go back to SoapCalc and adjust accordingly.

I melt the oils in the microwave.  About a minute at a time and I stir in-between.  

Next I measure the caustic soda.

I prefer not to store it among the foodstuff in the kitchen so
I keep it in the garage.

I take the small pyrex jug and the scale and measure out there and bring it back to the kitchen.


I then measure out the liquid into the pot.  I usually just put the pot on the scale and pour in whatever liquid I'm using.

Then I put the pot on the stove and turn the exhaust on full while I slowly pour the caustic soda into the liquid.

The liquid gets very hot so I let it sit and cool down.

If I need to hasten the cooling I'll simply let some cold water run on the outside of the stainless steel pot.  That cools it pretty quickly.
Once everything is the same temperature I pour the liquid into the oils.

I try not to heat the oils too much and often leave a little bit of the solid oils to melt on their own while the oils cool down to the correct soaping temperature.  Or even have some solid bits still floating like here.  The stick blender takes care of it.

I prefer to soap at about 40°C / 100°F, so I let both oils and water cool to around that temperature.

Here is why I love to make soaps.  The Rhubarb oil is yellow with a strange greenish, almost iridescent cast to it.  But once the lye hits it, it turns red.

I love that.

I use an old Bamix stick blender that I got in a thrift shop.  I really like it.  It's very sold and rather quiet.
Next is the fun bit: Turn on the stick blender and watch the swirls.

I don't really mix for very long.  I'm not too bothered about trace.  The soap mixture will reach trace on it's own if it is properly blended.  At least I have never had any problems with that.


I then pour in my essential oils, which I have already poured into a small bowl.  I do not have a scale that is sensitive enough to measure essential oil blends.

Since my recipes are small, I may use only a few drops of this and a dash of that.  My scale can measure down to +/- 2 g (that's around 0.07 oz) and that isn't enough accuracy to use it for fragrance.  So I just make my fragrance blends on instinct.

I usually try to avoid using the stick blender too much for the essential oils, since they are so volatile.

Once all the ingredients are blended, I pour the soap into moulds.  I have wooden log moulds and I like those.

I'm usually not concerned if they gel or not.  I just let it happen.

But, if I do not want them to gel I'll put the moulds into the fridge or even freezer overnight.

Or sometimes I use smaller mould to avoid gelling, but that doesn't always work. 


I always use a small pin (knitting needle, the end of a thermometer or a chopstick) to make swirls in my soaps to decorate the tops.  I studied the way other peoples soaps look like and I tried to get different looks.  But mine always looked the same.  The funny thing is that when my cousin and I were doing this together and she would use the same implement and the same type of movement we could easily tell our soaps apart.  So I guess this is my look.

I added dried flowers.  That may be too cutesy for some, but when I was looking through my old photos as I uploaded them to Flickr I really loved the look of them.  So even if they get spoiled when they get wet I still like them like that.

Monday, October 28, 2013

Peppermint Potato Candy

It sounds like an oxymoron.  How can a potato make a delicious candy?  I wish I could say that this is an old family recipe and my grandmothers have used potatoes in candy for generations.  But I'd be lying.  The truth is that I had agreed to give a talk about potatoes on "The Day of the Potato".  This is a part of a series of happenings that the Agricultural college of Iceland hosts to increase awareness of the importance of preserving genetic variety.

I happen to be the foreman of the vegetable club of the Horticultural Society and I had also given a talk on Rhubarb a few years ago.  So I was asked to do this and I said no.  So a few weeks later they talked to me again and said that no one had wanted to take this on.  So I said yes.

Then I sat down at the computer and looked for interesting recipes.  Because unlike Rhubarb, on which I had been collecting recipes, I just boil and bake potatoes and that would be a very boring talk.  So I concentrated on finding unusual recipes with potatoes.  And much to my surprise I found them in droves.  Apparently, making candy with potatoes was quite common in the 40's and 50's.  So I had to try pretty much every recipe I found.  Some were better than others and this one was a favorite.  All of them used boiled and mashed potatoes and combine it with powdered sugar.  I always have some leftover from dinner.  It's nice to be able to use them for something fun like candy.

¾ cup Mashed boiled potato
2 tsp Soft butter
1 tsp Peppermint extract

Whip all those together (a machine is best for that)

Add a little at a time:
7-8 cups Powdered sugar.
It will, and should be, a pretty stiff dough.
Push into a square form (I line mine with baking paper)

Melt together over a bain marie:
2 cups of a Dark chocolate
1 tsp Butter

Pour over the peppermint dough.
Put into a refrigerator  and let it get cool.
Remove from the form from the fridge and cut into squares.
Enjoy!


Wednesday, October 16, 2013

Washing Icelandic Wool Fleece

There is something incredibly cool about being knowing how to work wool from being a heap of freshly shorn fleece to a finished garment.  After I learned to spin I was only missing the first link (apart from the actual sheering).  I bought fleece from two sheep this spring when I was  doing the course on spinning.

I knew they would be rather smelly and dirty and that washing it would require the bathtub for a couple of days at least.  So it's been sitting in a plastic bag (not the best storage) in the garage because hubby wouldn't like it at all if I barred him from the bathtub for days.  But this weekend I found myself alone in the house and out came the fleece.

I don't mind the smell.  It's actually kind of nice.  Very farm-y, if you know what I mean.  But perhaps not a smell one would want on a garment.

The fleece was even dirtier than I expected and didn't really know if I could get it white nor was I hopeful that I could get rid of that farm-y smell using only water.

I had only gotten verbal instructions from my spinning teacher about how to wash the wool, so I searched the internet to get some more viewpoints.

Most people seem to use soap or detergent, but since my teacher only uses hot water, I decided to stick to her method and see if that worked.  I do have to admit that using stale urine sounds awsom and it probably is the best method.  It was used traditionally here, as well as in many (if not most) other countries, to get the wool really nice and soft.  It does make sense to a soapmaker that an alkali (the stale urine) and oil (the lanolin, although it is more of a wax than an oil) would make some sort of soap and therefor it should work quite nicely.  Something that I'm sure to try at some point.  Right now the collection and storage is a bit of a problem.  I need to negotiate with hubby about where I might put a collection container.

My biggest worry was that the wool would become felted by too much movement, but since I wasn't using soap I just decided to go for it.  Wool can take quite a bit of heat without felting, it just doesn't like sudden changes in temperature.

The washing is quite straight forward, but takes a bit of effort and time.

I filled the bathtub with 50°C / 120°F hot water and gently pushed a big chunk of fleece into the water.  I let it sit for about 30 minutes and then drained the filthy water.  I found it easiest to do that by putting the wool on a wooden thingy (it used to be a playpen, but I made a dog-gate with one part of it).  Then I filled the bathtub again with some more hot water, slightly cooler this time.  I think I did this four times in all or until the water was running pretty clear.  I let the wool sit overnight to drain and dry.

By the next morning it was quite dry, at least it was far from dripping.  So I hung it up on a coat hanger to dry completely.  It made a nice sculpture by the stairs for a while.  It seemed a shame to take it down.  I had some more hanging in the garage.  That was quite a lot of wool, and I only washed the cleanest bits from the middle.  So I still have quite a bit of wool in a black plastic bag in the garage, ready for the next time hubby is away overnight.

After drying the wool, I needed to separate the coarse outer hairs (tog) from the softer undercoat (þel) and that is done simply by pulling the long silky hairs from the coat.  The texture of the two is quite different, the outer hairs are very long and shiny, almost like human hair.  While the softer inner wool is lovely and nice and soft.

Since I didn't use soap there is still quite a bit of lanolin left in the wool and that makes it very nice to touch and lovely to spin.  I intend to spin some of it like that and leave it un dyed and make something nice out of it.  Preferably something that I would wear next to my skin.  The lanolin really is the nicest moisturizer and to imagine wearing a garment that contains a natural moisturizer.  What could be more luxurious.

Monday, August 26, 2013

Old Fashioned Ice Cream

I bought an old fashioned Ice cream maker a few years ago.  I didn't really know what it was, but the colour was adorable and whatever it was intrigued me.  The people at the thrift store were excited that I bought it and asked me what it was because they had no idea either.  These are not at all common here and I assume that it was bought in the States by some seaman who thought his wife would enjoy using it.  Since it is practically unused and mint condition, I'm assuming the wife didn't really think it was such a hot idea.

But I love it and I have so often planned to use it, but never taken the plunge.  It's so funny how doing something that I haven't done before is so impossibly difficult.  And then once I do it, it's really easy.  So I decided to make Rhubarb Ice cream in it.

I love Rhubarb ice cream.  Nobody else seems to, which I find very strange.  But I had some rhubarb and there was a family party and I offered to bring dessert.  The family was a bit skeptical.  My daughter confessed to having serious doubts beforehand, but once they tasted, they were converted.  Or at least that is what they told me.

The recipe for the ice cream is very easy, I posted it before here.  Except this time I used a whole Vanilla pod for the ice cream instead of the vanilla sugar/essence that is specified in the recipe.  It's not a lot of ice cream, probably about a quart (or 1 liter).  There were 8 of us and all had a nice portion each, but it was also served with Rhubarb soup and whipped cream.  I actually like smaller recipes of ice cream since I like to make more flavors rather than a huge amount.  Coffee ice cream is probably my favorite, along with the Rhubarb and of course real Vanilla.  The taste is just so much better.

Making ice cream from scratch is very easy.  I started with two egg yolks, one tablespoon  powdered sugar, seeds from half a vanilla pod and mixed it together with a fork.

Five stalks of  rhubarb are chopped into little pieces and boiled with a little bit of water and 3,5 oz sugar.  Or one can use rhubarb mash from making the rhubarb soup.  The rhubarb is cooled while 1 and 1/4 cup of whipping cream is whipped.  Once the rhubarb has cooled, it is folded together and poured into the ice cream maker.

I had never used this old fashioned ice cream maker before, so I had little idea how much salt would be needed, but I bought 4 kilos (8punds) of rock salt.  I used about half of that, 2 kilos (4 pounds) and all the ice I had, alternating a dash of salt and a smattering of ice.  But I did make this recipe twice, and could churn it with that amount of salt and ice.  (This meant that I had some ice cream that was for me only after the party.  Oh, joy.)

Then churning by hand.  The mechanism of this is really interesting and I would actually love to have a smaller unit to use.  This large bucket is just a bit too big for the kitchen and so it has to reside in the garage, even if the turquoise  colour is just fantastic.

I didn't really know how long it would take to churn the ice cream.  It actually took shorter time than I thought, but then the amount of ice cream was only about half of the capacity of the ice cream maker.  I think it only took 15-20 minutes to churn the ice cream.  I loved peering into the ice cream  maker and watch how it moves the ice cream so slowly.  It all looks a bit weird, but then suddenly everything starts to flow smoothly.  I took the thing apart, emptied out the container and put the ice cream into the freezer to store it until it was time to go to the party.

I served the rhubarb ice cream with the fabulous rhubarb soup and lots of whipped cream.

There is nothing in this world that doesn't taste better with lots of whipped cream.  And then it was sprinkled with dark chocolate.  Although some cocoa nibs are also very good with this.  As is chopped dark Toblerone.

Saturday, August 3, 2013

Lupine dyeing - Lupinus nootkatensis

The Alaskan Lupine (Lupinus nootkatensis) is one of those invasive species that are impossible to eradicate.  But it is pretty with it's blue and violet flowers and it does give great colour as a dye plant.  The leaves will give a good yellow, but it is the flowers that are more interesting because they give very bright and beautiful greens.  Most of the time lime green.

I got some pretty amazing colours this summer.  I went with my daughter to pick them down by the river where they grow in frightening abundance.  We picked the darkest coloured flowers that we could find and stripped them from the stalks.  We were careful to remove all leaves, because we didn't want too much of the yellow colour.   After picking a few full plastic bags we went home and dumped them into a large pot and filled it up with water.  The flowers simmered for over an hour and then was left to cool a bit before squeezing all the liquid from the flowers.

The liquid is a very deep wine colour, but the most common colour that comes out of the dyeing in a strong lime green.  It never ceases to amaze me, the tricks that colour plays in this process.  I used alpaca yarn to dye, skeins of 50g /1,8oz.  I've been using that for most of my dyeing lately, since I want to knit a soft and comfy sweater.  The Icelandic wool isn't necessarily what one wants next to the skin.

Since I didn't have any pre-mordanted yarn, I decided to mordant simultaneously with the dyeing, something which I haven't done before.  And because I am forgetful I first dumped wetted yarn into the pot and started to heat it up gently (it's important to take at least an hour to heat wool up to the 80-90°C / 180-200°F or so that is needed to dye) only to realize that I had completely forgotten to put in the mordant.

I added 10% (5 gr.) alum and 2% (1 gr.) cream of tartar, which I dissolved in hot water.  And then proceeded to heat up the liquid to about 85°C / 190°F.  I kept that temperature for an hour.  When I lifted the yarn out of the pot, I was floored by the turquoise colour that I got.  I have never seen a  colour like that from Lupine, so I wasn't about to chance loosing by letting it stay in the dye liquid any longer.  Therefore I didn't let the yarn sit and cool, but took it up and let it air cool before washing it out in clear water and some detergent.  The second skein I put into the dye liquid turned a very pretty green, I added the same amount of mordant to the dye liquid.  And finally I put in a third skein and got a lighter green.

Now I had to repeat this to see if I could replicate the colour.  I was a bit nervous since I had not really been careful to write everything down as soon as I did it.  That is a big mistake in dyeing.  Really, seriously.  One needs to take very careful notes and write everything that one does, times, tempertures, any deviations from the norm.  Just write everything down.

I had to try to replicate what I had done and write down every step of the way and lo and behold, I did manage to get almost the same colour.  I haven't tested it to see how lightfast it is.  I guess I should do that.  I did however see a shawl that someone had done with beautiful yellows from lupine and greens from lupine overdyed with indigo.  And there was no sign of fading in that.  However, I realize that the flower colours are the ones that are the most likely to fade in strong sunlight.  But on the bright side, there has been very little sun here this summer, so that isn't such a huge problem anyway.

Tuesday, July 23, 2013

Skyr

I usually make yoghurt for breakfast, but the other day decided to make the traditional Icelandic skyr.  I used to have skyr for breakfast and lunch when I was a kid, long before I had heard about something called yoghurt.

Skyr is really good and it's good for you.  Skyr is really a cheese, although we are used to it as a sweet dish.  It's always made from skim milk which we call "undanrenna" and has a fat content of 0,1%.  Which is practically no fat.  Not that I avoid fat.  We eat skyr with a mixture of cream and full fat milk, sugar and blueberries.  Which of course are only available in the autumn, but it seems that we always had them when I was young.  Now they are imported all year round, so I can have my skyr with blueberries, even if the imported berries taste a bit more watery than the small local variety of wild blueberries.

I haven't made skyr before, but it is surprisingly easy, although a bit more involved than making yoghurt.

I started with 2 liters (2 quarts) of skim milk and heated that up to 90°C / 195°F and held it for more than 3 minutes.  Then I cooled it down to 42°C / 108°F.

Next add fresh skyr (or skyr culture at 1% of the milk volume, if that is available).  I used fresh skyr with live cultures, about 1/2 cup for my 2 liters.  Yoghurt can be used instead of skyr.

Then add Rennet, only 1 drop per liter and stir it gently for a minute.

This needs to sit still for about 4-5 hours.  I put it in the oven and turned the heat to as close to 42°C / 108°F as I could.

By now the milk looks like a jelly (pretty much like cheese does at this stage) and now it needs to be sieved at room temperature.

I did that using cheesecloth and let it sit for a few hours.  My instructions said 10 hours, but that wasn't necessary.  The whey drained very quickly.

I spooned the skyr into a jar and put it in the fridge to cool to below 10°C / 50°F at least.

At this stage the skyr is realy to eat and now one can add all sorts of flavors, sweet or savory.

My preference is to stir the skyr with some half and half and a little bit of honey.  I then store it and spoon it out for breakfast, pour some milk (or half and half) over it and add fruit.  Eat it with a tablespoon, a bit of skyr, some milk and a few berries.  Yumm.

Out of the 2 liters of skim milk I got 1/2 liter of skyr and a lot of whey.  The whey (called Mysa) used to be drunk as a refreshing drink in the olden days, tasting a bit sour.  My whey wasn't very sour since I only let it sit for 4-5 hours in the oven, but I have mixed it with Rhubarb syrup and some lemon juice as drink.  There is a bit of taste, that I need to get used to, but it's very healthy, full og nice gut loving bacteria.

Monday, July 15, 2013

Peasant Shirt - Sewing Instructions

The shirt that goes with the 19th century Upphlutur is a very simple peasant shirt. All the pattern pieces are rectangles and it's very easy to make adjustments to fit different sizes. This is a size L / 12 US / 14 UK / 42 European.

To make the shirt you need two shirt lengths of 150 cm / 60" wide fabric. Measure from mid shoulder and as far down as you would like the shirt to be long.  In my case it is about 80 cm /39,5".  So I would need 160 cm or 63" of fabric. My fabric is a fine bleached linen, but fine cotton is also used and even a blend of wool and cotton.

I hand sewed my shirt, using a combination of running stitch and back stitch, three running stitches and one back stitch.  The seams are first sewn together on the right side and then again on the back, so that the edges are hidden and there is no need to zik-zak. But it is perfectly acceptable to sew the shirt on a sewing machine and use zik-zak if one want to do that.  The pattern is in centimeters, but I have also included inches, but those are slightly rounded off.

Now cut two pattern pieces for the sleeves.  These measure 50 cm by 60 cm.

One one side you should mark 15 cm /6" from the center.  This is where you put small gathers on the sleeve.  On the same side mark 10 cm / 4"at the edge on both sides, this is where the square pieces will be fitted under the arms.

The main pattern piece is one long piece that is both front and back, so that there are no shoulder seams.  Mine was 55/22" cm wide by 155/62". I added about 2 cm (slightly less than an inch) in seam allowance all the way around.  Check a favorite shirt and measure it's with to see how wide you want your shirt to be.  Be aware that the wider the shirt body is, the lower on the shoulder the sleeves are going to be.

The shirt should be about 5 cm /2" shorter in the front, than in the back and have slits in the sides.   Mark for the slit on both sides of the front about 10 cm/ 4" up (12 with seam allowance) and on the back mark for the slit about 15 cm (17 cm) on both sides.

Also mark about 10 cm on either side of the mid shoulder line (see drawing).  This is where the gathered part of the sleeve is going to be.  Note that the shoulder seam is 80 cm from the bottom of the back and 75 cm from the bottom of the front.


Also, cut a neck lining. In my case a rectangle measuring 7 cm /3" by 43 cm /17".

Now comes the only tricky part.  You need to draw the neckline and cut that.  It's not hard, but cutting into fabric like that can be daunting.
Mark the center of the fabric and the shoulder seam.  From there measure 3 cm / 1 1/4"towards the back and 12,5 cm / 5" fowards the front.  Then measure 7,5 cm / 3" to either side (see drawing).
Then draw the rounded out shape as you see in the picture. Also measure 17,5 cm/ 7" down from the front of the neck opening, for the slit in the front and cut that.
You can adjust these measurements slightly to fit your size, although I have a very average size head and neck so it should fit most sizes.

Now cut the pattern pieces for the sleeves.  Two pieces that measure 50 cm/20" by 60/24" cm plus seam allowance.  On one end, measure 15 cm from the center on either side to mark for gathers.  On the other mark for the slits, 11/4,3" cm.

Also cut the lining for the sleeves, 7 cm by 25 cm plus seam allowance.

Also cut two square pieces, 10 by 10 cm/4" by 4" plus seam allowance.  This will be inset under the arms so that the arms are not too tight.
To start sowing it's best to begin to sew all the slits.  Start with the slits in the large piece. There's two in the front and two in the back. Then do the sleeve slits.

I rolled them twice, 1 cm wide,  and then stitched them down using tiny stitches so that there is no need for zik-zak. 
Then do the opening at the neck.  Do not worry about the very bottom, it will be hidden with a fold that is put in at the end.

Here is a detail of the bottom of the neck opening.  The seam is tapered to the bottom.  I stitched this in place with small stitches using linen thread.  This can also be sewn in machine close to the edge. 

Here is a detail of the slits which shows how they are tapered on one end.  Now sew the sleeves together leaving 10 cm /4" at the top. This is where the small square piece is sewn in.

Next sew in the two small square pieces one to each sleeve.  They are placed like a diamond between the seams in the sleeves.  The other two sides are eventually sewn to the large piece as a part of the sleeve.  Note how this square piece is sewn in place so that the seam tapers towards the edge.


Now the sleeves need to be gathered to fit the main pattern piece.  There are 30 sm that need to be gathered down to 20 cm.
Since I wasn't using a machine I made tiny folds instead of gathers and pinned them down, but gathering by machine is also very acceptable.

Once this is the correct measurement the sleeves can be sewn to the main piece.  And then finally the long side seam and 

Now the linings at the neck and the sleeves are sewn.  First attach one long side and stitch in place.  Then fold over and fold the seam in and stitch the lining in place (hiding the seam) and make the edges flush with the slits.

At the wrists the fabric is folded a few times to fit the lining.  There is no specific measurement because the width of the sleeve and the wrists varies, but on my shirt there were 8 folds on the front of the sleeve and 1 towards the back.
Almost finished!
First sew buttons onto the lining of the sleeves.  These come on the front of the sleeve and the buttonhole, which is towards the back.

I find it easier to do buttonholes by hand, but some machines also do a great job of it.

Lastly, sew a small fold into the bottom of the neck slit.  I stiched a small heart, but it can be a simple square.

Sunday, June 30, 2013

Icelandic costume - 19th century Peasant Shirt

The problem with wanting to own the Icelandic national dress is that it is very expensive.  Not just the jewelry, but the dress itself.  The materials are not prohibitively expensive, wool, linen and cotton, and one would of course always want to use good quality fabrics for something that should last a lifetime or more.  But one can not buy a pattern or instructions on how to make it.  One can have it made by a professional seamstress and that costs about 2.500$ excluding materials.  The other option is to take a course in sewing it, guided by a professional seamstress.  Such a course costs 1.200$ in addition to materials.  The course does not include instructions on how to do the embroidery or lacemaking that is needed.  One can use old stuff, buy new or take separate courses in each technique.

There seems to be a consensus among those who know how to make the dress that there is only one right way to make it today (although admittedly some choices are allowed) even if there were numerous variations in the olden days.  Since I am much taller than women used to be, there is no way for me to buy an older dress, I have to make it new.  But I do not agree completely with the proportions of the dress as it is made today.  Being almost a foot taller than my forbearers, I do not think that enough attention has been paid to proportion as women have gotten taller.  There are things that are always made the same length in centimeters, no matter who it is being made for.  Additionally so many things have changed in the course of the years and the practicality of modern life must in some way influence the way we make traditional national dresses.

For example, I think the waist is too high.  In the olden days women would  sometimes have the waist very high in order to have room for a pregnant belly under the skirt.  After all they were pregnant most of the time for years and years.  This is not an issue today.  I also think that the very bulky skirt should be slightly altered in the way it is sewn, to make is less bulky without radically changing the way it looks.  I would just look a bit slimmer.  And I think the corset would be improved if it was slightly lower, longer and fabric that goes under the skirt should also be longer in my opinion.  I have seen that variation in an old costume in the National museum and I think it looks much better.


In my opinion there needs to be a clear goal in the preservation of the national dress.  Naturally it is important to preserve the overall look, but even more important is the preservation of the traditional handiwork.  Even if it was most common to make the dress out of wool, including the underware, no one would really want to do that today with central heating everywhere.  So if lighter materials are allowed and synthetic dyes (something which I'm not too crazy about) why are we stuck with making the patterns so unbecoming that the younger women do not want to wear the dress?


If one takes a sewing course, the seamstress takes measurements and makes the pattern and cuts the fabric.  No patterns are handed out, so that means it is difficult to make another one and also that there is very little room for individual preferences.

I made the shirt of linen and sewed it all by hand.  Somehow it seemed like sacrilege to make a 19th century shirt on a modern sewing machine.  The shirts were originally underclothing and most commonly made of lightweight wool, although more prosperous women would have owned underclothing made of imported cotton, linen and even silk.

I couldn't find a fine linen thread in stores here and was quite shocked to be offered polyester thread to sew my precious shirt.  I ended up importing thread from Denmark.  Since the seller didn't accept credit cards, the transfer was kind of expensive for the small amount that the thread cost, so I ordered some fabric also.  It was a small quantity of printed cotton in two 18th century patterns and a lovely linen, a bit heavier than that which I used for the shirt and I thought I would use it for a petticoat.

The shirt pattern is a very simple one, basic peasant shirt that is common throughout Europe.  All the pieces are rectangles, the largest is the main piece which is both front and back with a hole cut out for the neck opening.  The shirt is slightly longer in the back, about 5 cm (2"), with slits at the sides.

I was measured by a seamstress who then cut the pattern.  I was adamant that she would cut the shirt patterns large.  I am quite tall, 5'10" and get really annoyed with small clothing.  I prefer roomy clothes and quite frankly I wanted to control the pattern to some extent and I wouldn't be able to adjust it to my liking unless I had large pieces to work with.  She obliged me and I got to make it the way I wanted.  I am very pleased with the result.

More detailed sewing instructions to follow.


Tuesday, June 4, 2013

Petticoat Instructions

The petticoat is really pretty.  I am almost finished with mine, except I decided to crochet the lace border rather than use the pretty linen lace that I bought.  The fabric is a very soft and lightweight finely striped light blue cotton.  I plan to use these petticoats as skirts in summer (if it ever comes).

There are two versions of the petticoat, one for Faldbúniningur and a different one for Upphlutur and Peysuföt.  I elected to do the one for Faldbúningur, but intend to sew the other type in a very nice, rather heavier, linen and use the pretty linen lace on that.

One needs about 3 meters (yards) for each petticoat and they are easy to make.  I use a size 40-42/10-12 US/12-14 UK clothing and am quite tall, but these measurements can easily be adapted to fit other sizes.

There are basically 3 pieces, front, back and the bottom flounce (I hope that's a word).  The front is not gathered but has an elastic.  The back is wide and has 4 folds, two on either side which cause it to be slightly longer in the back.  The flounce is four rectangular pieces of fabric sewn together and gathered.

These instructions are probably not detailed enough for someone who hasn't sewn before, but for most they should be enough.

Start by measuring your waist. Mine is 85 cm / 33.5".  Divide by 2 (42.5 cm / 17") and that is the width of the front at the waist.  Add to this 5 cm/ 2" (2,5 cm / 1" on either side) and that is the width of the front piece at the bottom.

Measure the length from your waist to the floor (add height of heels, if you usually wear heels). Subtract from this about 10 cm / 4" because the petticoat is longer in the back.  My length is 109 cm / 43" and I made the length of the top half 50 cm /20" and the flounce also.

The back piece is the really interesting part.  It is basically a 1/4 round.  It is wider than the waist, but gets pulled in by 4 folds which make it drape nicely in the back.  I simply drew up a circle with a radius of half my waist measurement (42,5 cm /17").  Then I measured 50 cm /20" from there, to get it to be the same length as the front piece.  The flounce is 4 pieces of 50 cm/ 20" times the width of the fabric, which should ideally be 150 cm /59".  The flounce could be slightly less gathered (i.e. 3 pieces) if the fabric is thick.  Also cut the waist bands, slightly longer than half the waist measurements and about 5 cm / 2" high (half that when finished).  Add a seam allowance to all pieces, at least 1 cm/1/4" when you cut your fabric.

Start by marking the folds in the back piece: Mark the center back and measure 4 cm /1,6" on either side and fold to the center and let the two folds meet without overlapping.  Now measure 8,5 cm / 3,3 " away from the center fold and fold 2 cm / 0,8" towards the center on both sides.  There should be 6,5 cm / 2,5" between the folds.  Stitch down.

Traditionally there are open slits in the sides, but one can sew in a zipper or add pockets to close them, but here I didn't do that.  Hem the slits and then sew the top pieces together at the sides below the slits.  Sew all flounce pieces together in a circle and then sew two gathering stitches at the top.  Start to gather te flounce to fit the top.  It's easiest to gather each of the four pieces to fit a quarter of the top so that the gathers are nice and even.  Sew the gathers to the top, right sides together.  It's also good to stitch the gathers to the top piece from the front about 2-3mm / or an 1/8" from the seam.

Sew the waistband to front and back pieces, first right sides together. On the back piece, fold the waistband over in the middle and fold in the seam and stitch in place.  On the front, cut a wide elastic to be about 10 sm / 4" smaller than the waistband and pin in place on either end.   Fold the waistband and the seam in and stitch in place.  Make one seam along the length of the waistband over the stretched eleastic to hold it in place.  Make buttonholes on either side of the waistband of the back and sew on two buttons on the front.  Or use snaps.  Finally add a lace to the bottom and hem the petticoat.

The petticoat for the Upphlutur and Peysuföt is identical to this except the front piece is all the way to the floor, so that it has a flat front, but the flounce is on the back.  Both are slightly longer in the back than they are in front because of the folds in the back piece.  I think that there is a certain charm in that, but since I'm still crocheting the bottom lace, I can't really try it on yet.  The crochet is a lesson in patinence, since the hem is 6 meters / 6 yards long and the 1850's pattern I'm using is 12 rounds.  But I'm almost there and then I'll have a lovely long summer skirt.  After all, there is a precedent for wearing ones underclothes as the national costume, so why not.

Friday, May 17, 2013

National costume


There are basically three versions of the national costume, all derived from "Faldbúningur" which dates from the early 16th century.  Prior to that women wore a long loose fitting one piece dress, probably with a belt.  This changed, and it became the fashion to wear two pieces of clothing, a pleated skirt and a narrow fitting jacket.  There was also some jewelry made of bras or silver, the silver often gilt.  An apron was worn, hanging in an ornate silver belt with the help of fairly large round buttons.  A piece of cloth, preferably ornately embroidered, also hung from the belt, and a rather peculiar, chimney shaped headdress.  Doubtless there were some undergarments, but since no garments have survived from this time, the knowledge of the dress is derived purely from illustrations of the time.  Since most of the texts were religious in nature, there aren't any illustrations of people in their underclothing and therefore the
knowledge is limited.  Not much is known about the dress in the 17th century, since most pictures show the women wearing a large overcoat and what is underneath is hardly visible.  But in the 18th century there are some illustrations that show the women's dress  Again, no dresses have survived from this time and the oldest surviving dress dates from 1809.

At that time, there don't seem to have been that many changes since the 16th century.  There was still the narrow jacket, either embroidered or embellished with gold or silver bands, or both.  Under the jacket there was underwear, a lightweight white linen shirt and a corset.  Women also wore up to 7 underskirts, according to some sources.  I guess they needed to keep warm.  The corset which could be in blue, red or green was embroidered with colourful silks with flower motifs and/or embellished with gold or silver embroidery and ribbons.

The corset was closed with filigree silver loops through which a silver chain was threaded.  The skirt was still bulkily pleated and always worn with an apron.  Both the skirt and the apron were embellished on the bottom with embroidery or velvet.  The clothing could be blue, red, green or black, and all the colours could be used together in the same costume.  The colours, naturally, all derived from natural sources, indigo for blue, madder for red and perhaps cochineal (although that was much more expensive) and a combination of weld and indigo for the green.  Black was a difficult colour to achieve, but George MacKensie describes dyeing in an account from 1810.  It was obtained by dyeing with Sortulyng, Arctostaphylos uva-ursi (Bearberry) and black earth, which undoubtedly contained a lot of iron.  It is also apparent that there was a lot of variation in the dress and women used whatever materials they could find, local or imported.

The headdress is a whole story in itself.  Faldbúningur derives it's name from the headdress, which was was originally a white cloth, shaped like a chimney and called "Vaf".  But in the 17th and 18th centuries that evolved into "Faldur", an elongated cone shape that had a forward bend in it.  This then changed into "Spaðafaldur", a flat spade like form, held in shape by pins.  For every day women used a knitted hat with "Skúfur" a kind of tail hanging down on one side.  This was decorated with silver.

There are now more or less three variations of this costume in use as a national costume.  One is "Upphlutur" which consists of the long skirt with a white shirt, a corset and an apron.  In this version the undershirt and corset are used as outer garments.  This verison is really the working garments of ordinary women of the olden day.  They would often take off their jacket and even the thick, heavy skirt and work in their undergarments.  Nowadays there is a 19th century version and a 20th century version.  Both use quite a bit of silver, both on the front of the corset and in brooches and a heavy belt.

The second version is Peysuföt, a tight jacket, almost always black nowadays, hooked in the front but gaping slightly over the breasts.  This version has lost the embroidery of the old jacket, but is always worn with a bow.  The skirt is the same heavy pleated skirt, again always black and there is the same type of apron, although Peysuföt were, by the 19th century considered better clothes and therefore the apron would not be a course woolen one, but made of silk or linen.  With this there is little jewelry, only a brooch and the silver for the hat.

The third type is a revival of the 18th century Faldbúningur and is in my mind the most spectacular.  It is colourful and ornate and it isn't a depressing black.  I want to make one, but it takes someone diligent about 3 years to make it.  And that's assuming one buys the silver.

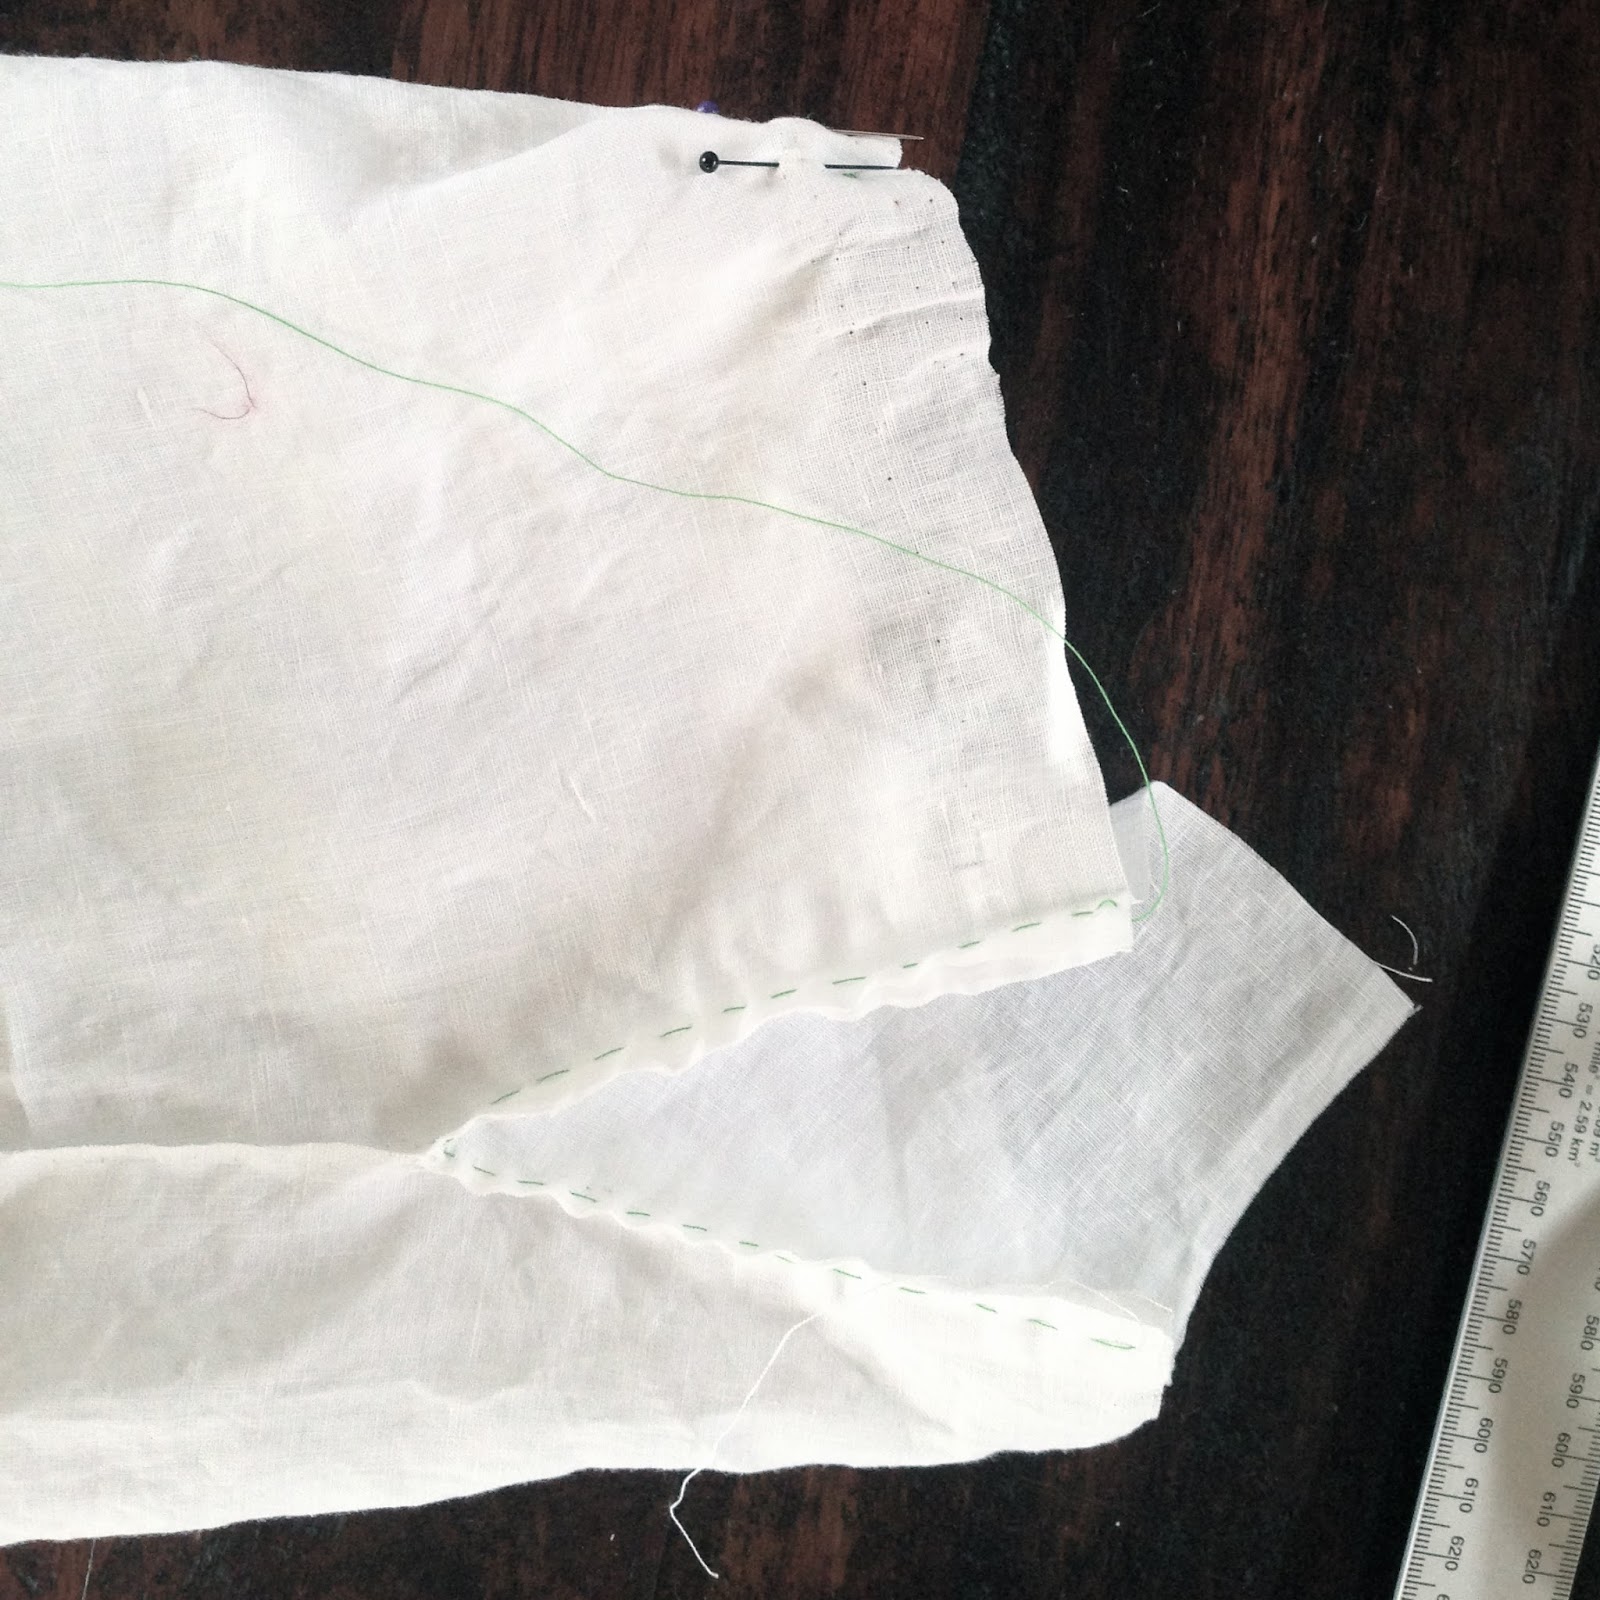
I have already made a silk apron and knitted a hat.  I am in the process of sewing a shirt and wills take a course in sewing an underskirt (petticoat - I love that word.  I used to buy a British magazine with that name back in the seventies) next week.  I have studied the construction of the other pieces and can hopefully make some practice pieces for fun this summer and start in earnest to sew next winter.  I want to start the silver work soon, though.  I'm really holding back not jumping into that, but there is a lot of stuff to do before I allow myself to do that.

Sunday, May 5, 2013

Filigree - Víravirki

I have been blessed in my life to have had some of the best teachers.  Really.  And many of the best teachers have been a lot older than I.  So I was really thrilled to get an opportunity to take a class from one of the oldest working goldsmiths in Iceland. She is over 80 years old and has been untiring in keeping the old traditional silver filigree making alive.  Silver filigree adorns the old dress that women wore and the art of making filigree goes back all the way to the vikings who settled Iceland.

I do not own a dress myself and I guess one of the reasons is that the cost of the silver is high, anywhere from US$ 3.000 - 5.000.  I have become more interested in making a dress for myself, using natural materials, like they did in the olden days.  Today it's not usual to use natural dyes, but I think the dress would be even more charming if one did.  But I saw the course for the filigree and decided to sign up.  I did two courses of jewelry in my fine art studies in the 80's, but I haven't touched a torch since.  I am not really a fan of taking courses in order to learn stuff.  I'm much more of a do it yourself type person so I tend to just dive into learning on my own.  But learning from the very master was too tempting, and sometimes it's just a lot quicker to have someone teach you the right way to do things.  It was fun.  More fun than I remembered.

The course was a short one, just two weekends and we were expected to do a brooch in that time.  I did a small one and turned it into a ring.  Brooches are an essential part of the dress, but I do not wear brooches really ever, but I have been wanting a large cocktail ring.  I also did a pair of earrings.

I was really surprised by the process.  It is very simple, but also very fiddly.  I got the bug very badly and although I hadn't thought about doing it myself, I decided to make the silver for my dress myself.  It is of course a lot more economical, even if here is some cost involved in equipment.  Most of the cost is in the amount of time it takes to make.

The Icelandic filigree is made out of two sizes of wire, an outer wire (Höfuðbeygjuvír) and an inner wire (Innanbeygjuvír).  The outer wire is a round 1mm silver wire that is rolled into 0,5mm.  The inside wire is especially textured and much finer.  To start to make a shape that is round, one bends the outer wire around two nails that have been hammered the desired distance into a piece of wood.  It is a humble beginning, and doesn't look like much.

The next step is to use pliers to coax the silver wire into a nice round shape with a small center and then this is soldered.  The resulting round shape is then worked with the pliers to make it into the shape one wants and to make it even and then it is ready for the finer filigree to be filled into the shape.

I chose to make mine in a heart shape and filled it in with little round shapes (Snirkill) which always get a small ball of silver (Korn) on top.  I had planned to fill in with leaves (Lauf), but that proved difficult so I choose another traditional shape, whose name I do not know.

I have since this time spent a lot of time reading about the dress and the silver that accompanies it in order to choose what type I want to do.  There has been some change in the style of dress and also the style of silver and one has to make a lot of choices.  I have chosen to do an older version, 19th century rather than 20th century.  There are no surviving dresses until around 1800, but there are illustrations of dresses back to the 16th century.  One day I want to do an 18th century dress (Faldbúningur), but that takes about 3 years, if one is quite diligent and I don't have the time right now.

I signed up for a course in sewing the shirt and the apron.  I started the 19th century shirt, which is made of a very fine linen (can also be cotton), but I can't find a linen thread here so I can't finish it.  I've almost finished sewing the apron, with thread from the fabric.  I just have to do buttonholes and slight finishing.  In the olden days it was either made from local wool, striped or checked, imported silk or, rarely, white linen.  I would love to weave the fabric for my apron, but then it also becomes tempting to spin the yarn for it and dye it myself.  So silk apron it is.  I have also started the knitted hat, which is most often done in black, but the older hats were more commonly blue and even red or green.  Since I didn't want black, I used the woad dyed alpaca from last summer, very happy to have found a worthy project for it.  I'm waiting for a course in sewing the very delicate embroidery for the corset, as well as a course in sewing an underskirt.  But the overskirt and the corset itself may have to wait a while.

This project is taking on a life of it's own.  It's my goal now to make a dress for July 19th which is my grandmothers birthday.  This year we will celebrate the centenary of her birth and I plan to finish some form of a national dress to wear that day.  It will undoubtedly deviate quite a bit from what is most often done, a lot of black, but it will be handmade and I will stay true to the handiwork and even more correct in terms of the colours I use since I plan to use mostly indigo dyed wool and a lot of white.  The white is not very traditional, but I don't care.  After all it will be summer.


Saturday, April 27, 2013

A Shot of Green

I sometimes make soup to have for lunch.  I started with a recipe for Broccoli soup that I got from a book by two Canadian doctors about food that fights cancer.  I do not have cancer, but a lot of people around me do and I was intrigued by the title.  This was many years ago and I have since been mindful to include some or all of the super healthy stuff in my diet, one way or another.

I have also experimented with this recipe, trying different kinds of vegetables, depending on what I had handy in the fridge.  One can really use pretty much any vegetables and adjust the seasoning to taste.

Cauliflower would be nice and light with its delicate flavor.  Beetroot would be a bright pinkish red, carrots for an orange soup and rutabaga for a yellow one.  An addition of linseed could be interesting.  My mom used to make a really good linseed soup.

But anyway, the other day I made this soup, and it's just really, really good.  It oozes healthiness and my mouth waters when I think of it's thoroughly green taste.

Start with sautéing one onion, preferably in butter.  If garlic is added, it should go in at the last stages, it doesn't take as much heat as the onions.  Add to the onions a tablespoon of turmeric (I am a firm believer in the health benefits of herbs and spices, turmeric is wonderful stuff and this soup is one way to get it naturally and in a form that makes is easy for the body to absorb.  So do not skip sautéing the turmeric and do include black pepper to get all the benefits.), half a tablespoon of freshly ground pepper and the same of crushed coriander seeds and mustard seeds.  Let the spices fry a bit in the butter.

Add a quart/liter of chicken stock to the pot (it's great to have homemade for this, but use the best quality store bought if that isn't available. Chop up one head of broccoli and add to the stock as well as one cup each, spinach and kale (in winter all I have is frozen and I use 4 balls each).  Let this simmer for 10-15 minutes. Take a stickblender to this a whizz it smooth.  Salt to taste and snip a lot of fresh parsley over the soup if it's available.

I store the soup in a large mason jar and keep it for a week in the fridge, it lasts me 5 days ( I guess the soup is 4-5 servings) which makes it perfect for weekday lunch, with two soft boiled eggs.  I have been changing my diet somewhat and feel much better for it. I avoid grains, sugar and starches.  For someone who isn't doing that, an addition of one potato will make the soup thicker, but I find that I don't really notice much difference.

Sombre colours

I bought this fantastic linen yarn on a cone. It was quite fine and I usually like chunky yarns to knit.  But I love linen and this was a...