Showing posts with label Icelandic national costume. Show all posts

Sunday, May 31, 2015

Icelandic National Costume - Baldýring 2 - embroidery, using silk Part 2

I came across some written instructions for making the traditional embroidery "Baldýring" the other day.  It's from a course like the one that I took, except we didn't get a handout.  I got permission to copy it from the woman who had it and it's been really helpful to put into words the second half of this tutorial.  I have also updated the first post, where appropriate.

Unfortunately there wasn't any description of how to make the shapes, so I will attempt to describe that.


First you need to draw the individual shapes so that they can be cut out.

Use a fine line Sharpie and thick mylar to trace each shape once.

From this drawing all the shapes will be made, so be careful to trace accurately from the original pattern, but only once for each shape, even if the shape is repeated several times.


Cut out all the shapes, taking care to follow the lines carefully.  Nail scissors with a pointed end, preferable curved, work best.


Use old fashioned carbon paper to copy the shapes onto parchment, or if you can't find that, acid free cardboard. I used a thick blunt needle to trace, but an old dried out ballpoint pen works fine.

This time you need to make the correct number of shapes for each border. In my case, for example, I made 6 leaves for each border, 12 in total. Be careful to use a steady hand. You want all the shapes to be the same dimension, as much as possible.

It makes sense to keep the shapes for each side separate. It can also be good to label each one with either L for left and R for right. And often the shapes are given numbers. Just make sure you can tell them apart somehow.


Now the shapes need to be slightly padded.  We were told to use vlieseline interfacing, which I have to say, bothered me a little.  I think that the older method of doing this, is to use felt.  And I'm sure that in the olden days it was felted Icelandic wool.

But after thinking about this for quite some time, I decided to just go with the flow and use the vlieseline.  It is very important to use acid free material, as the silk will just be eaten away by acidic material in a few years.

Be careful when you attach the padding to keep the padding on the right side so that the shapes are mirrored for either side.


I used rabbit skin glue to attach the shapes to the padding.  After the glue is dry, you need to trim the padding and file the edges of the shapes.  An inexpensive diamond nail file works a treat.

You need to make sure that the same shape on each side are the same, so work on the left and right  shapes at the same time. Match them up (mirror them) and file them to the same size and shape.

Lastly file the padded side at the edges to make them slightly rounded.


The next step is to sew the shapes down onto the velvet.  This is done with black thread, a needle nr. 9-10.


The shapes need to be sewn very tightly to the velvet. In the photo the sewing is too loose.

There is a pattern as to how best to sew each shape down.  The points are sewn with a sharp V, but the rounded shapes need several straight lines, as shown.

Be aware that the rounded shapes are much harder to do evenly in the final embroidery than the pointed shapes.  Take that into consideration when you choose your pattern.


Althought the photo is out of focus I wanted to show how even the embroidery can be when an expert does it.

This was sewn by our teacher as an example, but she did tell us that if we look closely at many of the old costumes in museums, we will notice that not everyone was good at this.  That made me feel a whole lot better.

It is usual to use three tones of the same colour for each leaf.  It gives life to the embroidery and is very characteristic of silk baldýring.  In order to cover the bottom of three leaved shapes, small sequins were used, sewn on with small metalic spirals.


The silk is sewn with a black thread so that the silk is only on the surface. This is done by securing the silk on the back and sticking a needle treaded with the silk through to the front. Always starting from a point in the shape. Remove the needle from the silk tread and leave it hanging, moving the silk from side to side as you sew the silk thread tightly down with regular black thread.

Once the middle of the form has been reached, secure the the end on the back and start from the opposite point. Remember to change colours as needed. There are usually 3 tones of the same colour in each shape.


Here is a short video that may be helpful to understand how this in done.


The silk tread is held across the shape and sewn down with a back tread on the opposite side. Always stick the needle up close to the shape, almost slightly under it and at a slight angle outwards and then down over the silk on the same side. Be careful to make the silk tread taught while tightening the lack thread.

When sticking the needle down, over the silk tread to fasten it, point is inwards (under the shape) and tighten and bring the needle (with the black tread) back up on the other side. Bring the silk thread over the shape again and sew down as before.


Sunday, June 22, 2014

The embroidered velvet - Baldýring


One of the most beautiful parts of the national costume is the embroidery. Embroidery is used extensiely in the oldest form of the costume, Faldbuningur.  There is a large flower border on the skirts, although it was also known to make them without embroidery, but with velvet lines instead.  The embroidery can be of two different types, Skattering and Blómstursaumur.  The latter is a special Icelandic embroidery stitch, very pretty, but I do not know the origin of the other one or if it is known in other countries.

And then there is the embroidery on the velvet borders of the vest, and on the jacket of the Faldbuningur. That is always done in an embroidery technique called Baldýring which is known as Gold embroidery in English.  In the older costumes it was done either with gold and silver thread or with silk.  I love the silk myself because it is so colourful.

I took a course in Baldýring and I am making the border for the vest.  It is not an easy technique to master, but I found that sewing the twisted gold threads down was fairly easy.  The Baldýring itself is not and I need to practice a whole lot before I can tackle the real thing.

Making the borders is quite involved and I want to write it down so that I do not forget it.  And also so that others can know how to do it.  I really think it is important to share knowledge, especially about old handwork and methods because they might so easily be lost.

So here is the start of a tutorial for making the velvet borders.  Since I am making the 19th century version, it will mostly talk about that, but I will put in notes about the differences in that and the 20th century version when appropriate.


The borders themselves are made from 3 layers, 2 good quality fabrics and a parchment or cardboard :

8 cm x 25 cm - Black cotton velvet
5 cm x 25 cm - Acid free light to medium stiff cardboard (it must be flexible) or parchment which is what was used in the old days
5 cm x 25 cm - Thin white cotton material

Cut two of each, one for the right side and one for the left.

The needles that are used are very fine needle nr. 9 or 10 for the Baldýring itself (the same type that as is commonly used in quilting). And also a nr 7-8 for general sewing. And a very large needle for the gold twisted threads.


The borders for the 19th century vest are 4-5,5 cm wide, the length varies slightly with the size of the vest, but it should be cut around 25 cm long.  It's finished length depends on the vest on which it is eventually sewn.

For the 20th century costume, the border is wider, about 8,5 - 10 cm, depending on the chest measurements of the woman. The length is the same.


The thin white cotton is stitched to the cardboard around the edges. This can be done by hand or machine. There is no need for a seam allowance.

Mark the direction of the nap with an arrow, so that you don't get confused and make sure to have the two borders, left and right, facing in the same direction.


The black velvet is faced right side down (away from you), and the nap facing up.

The white cotton/cardboard is then placed on top of the velvet, cotton side facing up.

Center the white cotton/cardboard sideways (horizontally) on the velvet. The length should be equal for both pieces.


The edges of the velvet are wrapped around the cardboard and the velvet is pinned in place.

Make sure you do not pin into the cardboard.

Stitch the edges of the velvet to the white cotton, using overcasting and taking care to stitch only the white cotton and velvet.

Do not puncture the cardboard itself.
Next you need to cut out a piece of thin paper to be 8 cm x 30 cm. Architectural tracing paper works really well.

This paper is wrapped around the velvet and stitched in place with a running stitch, this time going through all layers, puncturing the cardboard.

This paper serves to protect the velvet from getting dirty while being handled when embroidering.


The last step before you can start the actual embroidery is to stitch the line drawing of the flower pattern in place.

Be careful to leave enough space above the pattern, at least 4 cm.

The line drawing is traced onto a thin mylar type of paper.

The stitching is done with a running stitch all the way around the rectangular shape and also around the shapes to be embroidered, through all the layers.

And now you need to make another one, with the drawing mirrored.


There are a number of patterns one can use and a multitude of colours, so the choice is not easy.  I went through a whole lot of patterns before deciding to draw my own.  Some of the patterns are quite old, while some of them date from the early 19th century.  But that is the subject of the next post.

Sunday, February 23, 2014

The Day of the Woman - First Day of Góa

Today is the first day of the old Nordic month Góa.  Góa is thought to have been a goddess is the old Nordic religion, but nothing is known of her other than the first day of her month is dedicated to women.
The name is konudagur in Icelandic, but kona is the word used for both woman and wife.

Similarily, the first day of Þorri, the previous month, is dedicated to men or husbands.  The name is bóndadagur, and bóndi means farmer or man as in the ending of the Icelandic word for husband, húsbóndi.

Those days are still celebrated here and they are much more traditional than Valentines day, mothers day and fathers day, all of which are imports by flower merchants.  Both days are celebrated gratulating the wife or the husband on the occasion of the day and it is now traditional to give flowers as a present.  In the olden day the husbands were supposed to hop around the farm on one leg, wearing only their shirt, but dressed in one pant leg, draging the other behind.  No similar feat was required of the women, as far as I know.  Not surprisingly, few (if any) men keep to this tradition today.

But anyway, today I get flowers from my hubby and a cake from the bakery.  All of which I am grateful for.  But I have to admit that I am a bit more excited about the flowers that I am in the process of making myself.  The wonderful flower borders for the national costume.  I had a hard time deciding on a pattern and ended up drawing my own, using elements from older patterns.

I really wanted to have flowers that I know and like and most of the patterns were too stylized to be recognizable.  Haveing been brought up by my biologist parents and taught about plants from an early age, I didn't want that.  So I searched for flower patterns that were recognizable and made a sketch of those.  The flowers I chose were Eyrarrós / Dwarf fireweed (Epilobium latifolium) at the top.  It is a member of the Evening primrose family and the national flower of Greenland.  It is quite magenta in colour and I used Cochineal to dye the embroidery silk pink.   I also love the tiny blue flowers of Gleym-mér-ey / Forget-me-not (Myosotis arvensis) and Woad blue captures the hue of those beautiful little flowers perfectly.

I also wanted to use Holtasóley /Mountain avens (Dryas octopetala) a member of the rose family, with eight white petals and a fairly large yellow middle.  It is the national flower of Iceland, but since white is never used in the special embroidery, that posed a problem.  I toyed with the idea of making it yellow, but gave that up altogether.  Instead I settled for two indistinct half opened buds from and old pattern.  That could be the common buttercup and I dyed a strong yellow with Weld and a darker one using lichen.  And at the bottom I put a half opened Eyrarrós again to repeat the pink.  The flowers are emerging from a flower pot, a well used symbol of the 18th century and a very common feature in many of the older patterns.  For the flower pot I intend to use both gold embroidery and the lovely golden yellow from the lichen Parmelia saxatilis (Shield lichen, or Litunarskóf in Icelandic).  It is the one that gives the lovely aroma.

I really like the outcome and look forward to starting to embroider this.  Dyeing all the colors wasn't as much trouble as I had feared and I love the outcome.  They are just gorgeous.  And since I also plan to knit a traditional triangular woolen shawl, I used the opportunity to dye the very fine wool for that, since the tiny amount of embroidery silk left me with plenty of dyeing liquor left to use.  Those colours also came out beautifully.  I have to admit that now I am getting really impatient to get the full costume.

The process of embroidering is the same as is used in Gold embroidery.  The Icelandic tradition uses both silk and silver and gilded silver thread.  I love the colorful silk and it was used on the older types of costumes and it really pops with the background of black velvet.  I have been attending a course in learning to embroider in this way and it does take a lot of time and practice.  The process of making the flower borders is also quite involved and laborious.  But hopefully well worth it once it's all done.


Monday, July 15, 2013

Peasant Shirt - Sewing Instructions

The shirt that goes with the 19th century Upphlutur is a very simple peasant shirt. All the pattern pieces are rectangles and it's very easy to make adjustments to fit different sizes. This is a size L / 12 US / 14 UK / 42 European.

To make the shirt you need two shirt lengths of 150 cm / 60" wide fabric. Measure from mid shoulder and as far down as you would like the shirt to be long.  In my case it is about 80 cm /39,5".  So I would need 160 cm or 63" of fabric. My fabric is a fine bleached linen, but fine cotton is also used and even a blend of wool and cotton.

I hand sewed my shirt, using a combination of running stitch and back stitch, three running stitches and one back stitch.  The seams are first sewn together on the right side and then again on the back, so that the edges are hidden and there is no need to zik-zak. But it is perfectly acceptable to sew the shirt on a sewing machine and use zik-zak if one want to do that.  The pattern is in centimeters, but I have also included inches, but those are slightly rounded off.

Now cut two pattern pieces for the sleeves.  These measure 50 cm by 60 cm.

One one side you should mark 15 cm /6" from the center.  This is where you put small gathers on the sleeve.  On the same side mark 10 cm / 4"at the edge on both sides, this is where the square pieces will be fitted under the arms.

The main pattern piece is one long piece that is both front and back, so that there are no shoulder seams.  Mine was 55/22" cm wide by 155/62". I added about 2 cm (slightly less than an inch) in seam allowance all the way around.  Check a favorite shirt and measure it's with to see how wide you want your shirt to be.  Be aware that the wider the shirt body is, the lower on the shoulder the sleeves are going to be.

The shirt should be about 5 cm /2" shorter in the front, than in the back and have slits in the sides.   Mark for the slit on both sides of the front about 10 cm/ 4" up (12 with seam allowance) and on the back mark for the slit about 15 cm (17 cm) on both sides.

Also mark about 10 cm on either side of the mid shoulder line (see drawing).  This is where the gathered part of the sleeve is going to be.  Note that the shoulder seam is 80 cm from the bottom of the back and 75 cm from the bottom of the front.


Also, cut a neck lining. In my case a rectangle measuring 7 cm /3" by 43 cm /17".

Now comes the only tricky part.  You need to draw the neckline and cut that.  It's not hard, but cutting into fabric like that can be daunting.
Mark the center of the fabric and the shoulder seam.  From there measure 3 cm / 1 1/4"towards the back and 12,5 cm / 5" fowards the front.  Then measure 7,5 cm / 3" to either side (see drawing).
Then draw the rounded out shape as you see in the picture. Also measure 17,5 cm/ 7" down from the front of the neck opening, for the slit in the front and cut that.
You can adjust these measurements slightly to fit your size, although I have a very average size head and neck so it should fit most sizes.

Now cut the pattern pieces for the sleeves.  Two pieces that measure 50 cm/20" by 60/24" cm plus seam allowance.  On one end, measure 15 cm from the center on either side to mark for gathers.  On the other mark for the slits, 11/4,3" cm.

Also cut the lining for the sleeves, 7 cm by 25 cm plus seam allowance.

Also cut two square pieces, 10 by 10 cm/4" by 4" plus seam allowance.  This will be inset under the arms so that the arms are not too tight.
To start sowing it's best to begin to sew all the slits.  Start with the slits in the large piece. There's two in the front and two in the back. Then do the sleeve slits.

I rolled them twice, 1 cm wide,  and then stitched them down using tiny stitches so that there is no need for zik-zak. 
Then do the opening at the neck.  Do not worry about the very bottom, it will be hidden with a fold that is put in at the end.

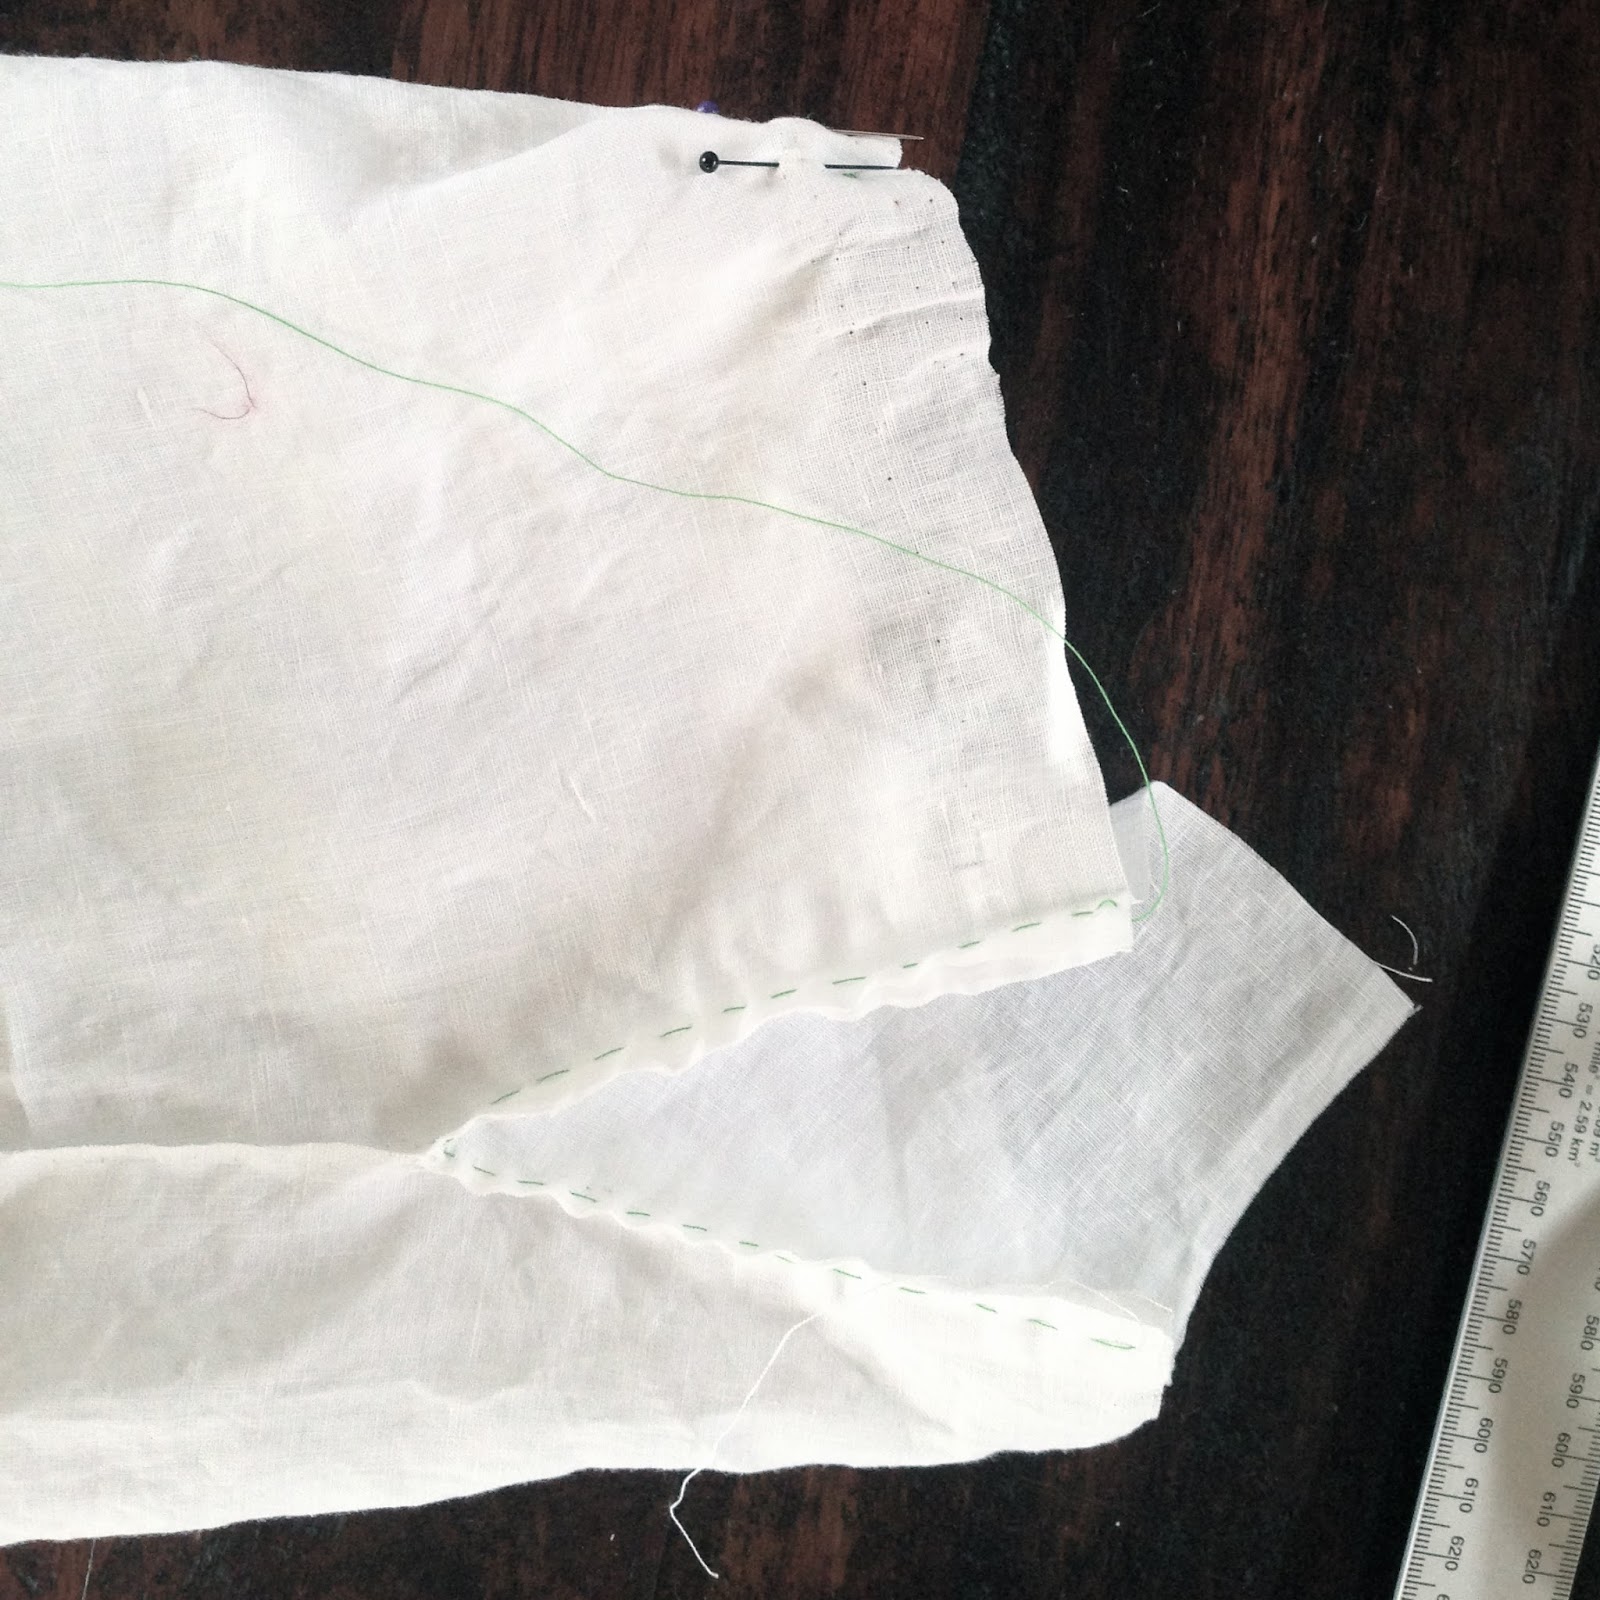
Here is a detail of the bottom of the neck opening.  The seam is tapered to the bottom.  I stitched this in place with small stitches using linen thread.  This can also be sewn in machine close to the edge. 

Here is a detail of the slits which shows how they are tapered on one end.  Now sew the sleeves together leaving 10 cm /4" at the top. This is where the small square piece is sewn in.

Next sew in the two small square pieces one to each sleeve.  They are placed like a diamond between the seams in the sleeves.  The other two sides are eventually sewn to the large piece as a part of the sleeve.  Note how this square piece is sewn in place so that the seam tapers towards the edge.


Now the sleeves need to be gathered to fit the main pattern piece.  There are 30 sm that need to be gathered down to 20 cm.
Since I wasn't using a machine I made tiny folds instead of gathers and pinned them down, but gathering by machine is also very acceptable.

Once this is the correct measurement the sleeves can be sewn to the main piece.  And then finally the long side seam and 

Now the linings at the neck and the sleeves are sewn.  First attach one long side and stitch in place.  Then fold over and fold the seam in and stitch the lining in place (hiding the seam) and make the edges flush with the slits.

At the wrists the fabric is folded a few times to fit the lining.  There is no specific measurement because the width of the sleeve and the wrists varies, but on my shirt there were 8 folds on the front of the sleeve and 1 towards the back.
Almost finished!
First sew buttons onto the lining of the sleeves.  These come on the front of the sleeve and the buttonhole, which is towards the back.

I find it easier to do buttonholes by hand, but some machines also do a great job of it.

Lastly, sew a small fold into the bottom of the neck slit.  I stiched a small heart, but it can be a simple square.

Sunday, June 30, 2013

Icelandic costume - 19th century Peasant Shirt

The problem with wanting to own the Icelandic national dress is that it is very expensive.  Not just the jewelry, but the dress itself.  The materials are not prohibitively expensive, wool, linen and cotton, and one would of course always want to use good quality fabrics for something that should last a lifetime or more.  But one can not buy a pattern or instructions on how to make it.  One can have it made by a professional seamstress and that costs about 2.500$ excluding materials.  The other option is to take a course in sewing it, guided by a professional seamstress.  Such a course costs 1.200$ in addition to materials.  The course does not include instructions on how to do the embroidery or lacemaking that is needed.  One can use old stuff, buy new or take separate courses in each technique.

There seems to be a consensus among those who know how to make the dress that there is only one right way to make it today (although admittedly some choices are allowed) even if there were numerous variations in the olden days.  Since I am much taller than women used to be, there is no way for me to buy an older dress, I have to make it new.  But I do not agree completely with the proportions of the dress as it is made today.  Being almost a foot taller than my forbearers, I do not think that enough attention has been paid to proportion as women have gotten taller.  There are things that are always made the same length in centimeters, no matter who it is being made for.  Additionally so many things have changed in the course of the years and the practicality of modern life must in some way influence the way we make traditional national dresses.

For example, I think the waist is too high.  In the olden days women would  sometimes have the waist very high in order to have room for a pregnant belly under the skirt.  After all they were pregnant most of the time for years and years.  This is not an issue today.  I also think that the very bulky skirt should be slightly altered in the way it is sewn, to make is less bulky without radically changing the way it looks.  I would just look a bit slimmer.  And I think the corset would be improved if it was slightly lower, longer and fabric that goes under the skirt should also be longer in my opinion.  I have seen that variation in an old costume in the National museum and I think it looks much better.


In my opinion there needs to be a clear goal in the preservation of the national dress.  Naturally it is important to preserve the overall look, but even more important is the preservation of the traditional handiwork.  Even if it was most common to make the dress out of wool, including the underware, no one would really want to do that today with central heating everywhere.  So if lighter materials are allowed and synthetic dyes (something which I'm not too crazy about) why are we stuck with making the patterns so unbecoming that the younger women do not want to wear the dress?


If one takes a sewing course, the seamstress takes measurements and makes the pattern and cuts the fabric.  No patterns are handed out, so that means it is difficult to make another one and also that there is very little room for individual preferences.

I made the shirt of linen and sewed it all by hand.  Somehow it seemed like sacrilege to make a 19th century shirt on a modern sewing machine.  The shirts were originally underclothing and most commonly made of lightweight wool, although more prosperous women would have owned underclothing made of imported cotton, linen and even silk.

I couldn't find a fine linen thread in stores here and was quite shocked to be offered polyester thread to sew my precious shirt.  I ended up importing thread from Denmark.  Since the seller didn't accept credit cards, the transfer was kind of expensive for the small amount that the thread cost, so I ordered some fabric also.  It was a small quantity of printed cotton in two 18th century patterns and a lovely linen, a bit heavier than that which I used for the shirt and I thought I would use it for a petticoat.

The shirt pattern is a very simple one, basic peasant shirt that is common throughout Europe.  All the pieces are rectangles, the largest is the main piece which is both front and back with a hole cut out for the neck opening.  The shirt is slightly longer in the back, about 5 cm (2"), with slits at the sides.

I was measured by a seamstress who then cut the pattern.  I was adamant that she would cut the shirt patterns large.  I am quite tall, 5'10" and get really annoyed with small clothing.  I prefer roomy clothes and quite frankly I wanted to control the pattern to some extent and I wouldn't be able to adjust it to my liking unless I had large pieces to work with.  She obliged me and I got to make it the way I wanted.  I am very pleased with the result.

More detailed sewing instructions to follow.


Tuesday, June 4, 2013

Petticoat Instructions

The petticoat is really pretty.  I am almost finished with mine, except I decided to crochet the lace border rather than use the pretty linen lace that I bought.  The fabric is a very soft and lightweight finely striped light blue cotton.  I plan to use these petticoats as skirts in summer (if it ever comes).

There are two versions of the petticoat, one for Faldbúniningur and a different one for Upphlutur and Peysuföt.  I elected to do the one for Faldbúningur, but intend to sew the other type in a very nice, rather heavier, linen and use the pretty linen lace on that.

One needs about 3 meters (yards) for each petticoat and they are easy to make.  I use a size 40-42/10-12 US/12-14 UK clothing and am quite tall, but these measurements can easily be adapted to fit other sizes.

There are basically 3 pieces, front, back and the bottom flounce (I hope that's a word).  The front is not gathered but has an elastic.  The back is wide and has 4 folds, two on either side which cause it to be slightly longer in the back.  The flounce is four rectangular pieces of fabric sewn together and gathered.

These instructions are probably not detailed enough for someone who hasn't sewn before, but for most they should be enough.

Start by measuring your waist. Mine is 85 cm / 33.5".  Divide by 2 (42.5 cm / 17") and that is the width of the front at the waist.  Add to this 5 cm/ 2" (2,5 cm / 1" on either side) and that is the width of the front piece at the bottom.

Measure the length from your waist to the floor (add height of heels, if you usually wear heels). Subtract from this about 10 cm / 4" because the petticoat is longer in the back.  My length is 109 cm / 43" and I made the length of the top half 50 cm /20" and the flounce also.

The back piece is the really interesting part.  It is basically a 1/4 round.  It is wider than the waist, but gets pulled in by 4 folds which make it drape nicely in the back.  I simply drew up a circle with a radius of half my waist measurement (42,5 cm /17").  Then I measured 50 cm /20" from there, to get it to be the same length as the front piece.  The flounce is 4 pieces of 50 cm/ 20" times the width of the fabric, which should ideally be 150 cm /59".  The flounce could be slightly less gathered (i.e. 3 pieces) if the fabric is thick.  Also cut the waist bands, slightly longer than half the waist measurements and about 5 cm / 2" high (half that when finished).  Add a seam allowance to all pieces, at least 1 cm/1/4" when you cut your fabric.

Start by marking the folds in the back piece: Mark the center back and measure 4 cm /1,6" on either side and fold to the center and let the two folds meet without overlapping.  Now measure 8,5 cm / 3,3 " away from the center fold and fold 2 cm / 0,8" towards the center on both sides.  There should be 6,5 cm / 2,5" between the folds.  Stitch down.

Traditionally there are open slits in the sides, but one can sew in a zipper or add pockets to close them, but here I didn't do that.  Hem the slits and then sew the top pieces together at the sides below the slits.  Sew all flounce pieces together in a circle and then sew two gathering stitches at the top.  Start to gather te flounce to fit the top.  It's easiest to gather each of the four pieces to fit a quarter of the top so that the gathers are nice and even.  Sew the gathers to the top, right sides together.  It's also good to stitch the gathers to the top piece from the front about 2-3mm / or an 1/8" from the seam.

Sew the waistband to front and back pieces, first right sides together. On the back piece, fold the waistband over in the middle and fold in the seam and stitch in place.  On the front, cut a wide elastic to be about 10 sm / 4" smaller than the waistband and pin in place on either end.   Fold the waistband and the seam in and stitch in place.  Make one seam along the length of the waistband over the stretched eleastic to hold it in place.  Make buttonholes on either side of the waistband of the back and sew on two buttons on the front.  Or use snaps.  Finally add a lace to the bottom and hem the petticoat.

The petticoat for the Upphlutur and Peysuföt is identical to this except the front piece is all the way to the floor, so that it has a flat front, but the flounce is on the back.  Both are slightly longer in the back than they are in front because of the folds in the back piece.  I think that there is a certain charm in that, but since I'm still crocheting the bottom lace, I can't really try it on yet.  The crochet is a lesson in patinence, since the hem is 6 meters / 6 yards long and the 1850's pattern I'm using is 12 rounds.  But I'm almost there and then I'll have a lovely long summer skirt.  After all, there is a precedent for wearing ones underclothes as the national costume, so why not.

Friday, May 17, 2013

National costume


There are basically three versions of the national costume, all derived from "Faldbúningur" which dates from the early 16th century.  Prior to that women wore a long loose fitting one piece dress, probably with a belt.  This changed, and it became the fashion to wear two pieces of clothing, a pleated skirt and a narrow fitting jacket.  There was also some jewelry made of bras or silver, the silver often gilt.  An apron was worn, hanging in an ornate silver belt with the help of fairly large round buttons.  A piece of cloth, preferably ornately embroidered, also hung from the belt, and a rather peculiar, chimney shaped headdress.  Doubtless there were some undergarments, but since no garments have survived from this time, the knowledge of the dress is derived purely from illustrations of the time.  Since most of the texts were religious in nature, there aren't any illustrations of people in their underclothing and therefore the
knowledge is limited.  Not much is known about the dress in the 17th century, since most pictures show the women wearing a large overcoat and what is underneath is hardly visible.  But in the 18th century there are some illustrations that show the women's dress  Again, no dresses have survived from this time and the oldest surviving dress dates from 1809.

At that time, there don't seem to have been that many changes since the 16th century.  There was still the narrow jacket, either embroidered or embellished with gold or silver bands, or both.  Under the jacket there was underwear, a lightweight white linen shirt and a corset.  Women also wore up to 7 underskirts, according to some sources.  I guess they needed to keep warm.  The corset which could be in blue, red or green was embroidered with colourful silks with flower motifs and/or embellished with gold or silver embroidery and ribbons.

The corset was closed with filigree silver loops through which a silver chain was threaded.  The skirt was still bulkily pleated and always worn with an apron.  Both the skirt and the apron were embellished on the bottom with embroidery or velvet.  The clothing could be blue, red, green or black, and all the colours could be used together in the same costume.  The colours, naturally, all derived from natural sources, indigo for blue, madder for red and perhaps cochineal (although that was much more expensive) and a combination of weld and indigo for the green.  Black was a difficult colour to achieve, but George MacKensie describes dyeing in an account from 1810.  It was obtained by dyeing with Sortulyng, Arctostaphylos uva-ursi (Bearberry) and black earth, which undoubtedly contained a lot of iron.  It is also apparent that there was a lot of variation in the dress and women used whatever materials they could find, local or imported.

The headdress is a whole story in itself.  Faldbúningur derives it's name from the headdress, which was was originally a white cloth, shaped like a chimney and called "Vaf".  But in the 17th and 18th centuries that evolved into "Faldur", an elongated cone shape that had a forward bend in it.  This then changed into "Spaðafaldur", a flat spade like form, held in shape by pins.  For every day women used a knitted hat with "Skúfur" a kind of tail hanging down on one side.  This was decorated with silver.

There are now more or less three variations of this costume in use as a national costume.  One is "Upphlutur" which consists of the long skirt with a white shirt, a corset and an apron.  In this version the undershirt and corset are used as outer garments.  This verison is really the working garments of ordinary women of the olden day.  They would often take off their jacket and even the thick, heavy skirt and work in their undergarments.  Nowadays there is a 19th century version and a 20th century version.  Both use quite a bit of silver, both on the front of the corset and in brooches and a heavy belt.

The second version is Peysuföt, a tight jacket, almost always black nowadays, hooked in the front but gaping slightly over the breasts.  This version has lost the embroidery of the old jacket, but is always worn with a bow.  The skirt is the same heavy pleated skirt, again always black and there is the same type of apron, although Peysuföt were, by the 19th century considered better clothes and therefore the apron would not be a course woolen one, but made of silk or linen.  With this there is little jewelry, only a brooch and the silver for the hat.

The third type is a revival of the 18th century Faldbúningur and is in my mind the most spectacular.  It is colourful and ornate and it isn't a depressing black.  I want to make one, but it takes someone diligent about 3 years to make it.  And that's assuming one buys the silver.

I have already made a silk apron and knitted a hat.  I am in the process of sewing a shirt and wills take a course in sewing an underskirt (petticoat - I love that word.  I used to buy a British magazine with that name back in the seventies) next week.  I have studied the construction of the other pieces and can hopefully make some practice pieces for fun this summer and start in earnest to sew next winter.  I want to start the silver work soon, though.  I'm really holding back not jumping into that, but there is a lot of stuff to do before I allow myself to do that.

Sunday, May 5, 2013

Filigree - Víravirki

I have been blessed in my life to have had some of the best teachers.  Really.  And many of the best teachers have been a lot older than I.  So I was really thrilled to get an opportunity to take a class from one of the oldest working goldsmiths in Iceland. She is over 80 years old and has been untiring in keeping the old traditional silver filigree making alive.  Silver filigree adorns the old dress that women wore and the art of making filigree goes back all the way to the vikings who settled Iceland.

I do not own a dress myself and I guess one of the reasons is that the cost of the silver is high, anywhere from US$ 3.000 - 5.000.  I have become more interested in making a dress for myself, using natural materials, like they did in the olden days.  Today it's not usual to use natural dyes, but I think the dress would be even more charming if one did.  But I saw the course for the filigree and decided to sign up.  I did two courses of jewelry in my fine art studies in the 80's, but I haven't touched a torch since.  I am not really a fan of taking courses in order to learn stuff.  I'm much more of a do it yourself type person so I tend to just dive into learning on my own.  But learning from the very master was too tempting, and sometimes it's just a lot quicker to have someone teach you the right way to do things.  It was fun.  More fun than I remembered.

The course was a short one, just two weekends and we were expected to do a brooch in that time.  I did a small one and turned it into a ring.  Brooches are an essential part of the dress, but I do not wear brooches really ever, but I have been wanting a large cocktail ring.  I also did a pair of earrings.

I was really surprised by the process.  It is very simple, but also very fiddly.  I got the bug very badly and although I hadn't thought about doing it myself, I decided to make the silver for my dress myself.  It is of course a lot more economical, even if here is some cost involved in equipment.  Most of the cost is in the amount of time it takes to make.

The Icelandic filigree is made out of two sizes of wire, an outer wire (Höfuðbeygjuvír) and an inner wire (Innanbeygjuvír).  The outer wire is a round 1mm silver wire that is rolled into 0,5mm.  The inside wire is especially textured and much finer.  To start to make a shape that is round, one bends the outer wire around two nails that have been hammered the desired distance into a piece of wood.  It is a humble beginning, and doesn't look like much.

The next step is to use pliers to coax the silver wire into a nice round shape with a small center and then this is soldered.  The resulting round shape is then worked with the pliers to make it into the shape one wants and to make it even and then it is ready for the finer filigree to be filled into the shape.

I chose to make mine in a heart shape and filled it in with little round shapes (Snirkill) which always get a small ball of silver (Korn) on top.  I had planned to fill in with leaves (Lauf), but that proved difficult so I choose another traditional shape, whose name I do not know.

I have since this time spent a lot of time reading about the dress and the silver that accompanies it in order to choose what type I want to do.  There has been some change in the style of dress and also the style of silver and one has to make a lot of choices.  I have chosen to do an older version, 19th century rather than 20th century.  There are no surviving dresses until around 1800, but there are illustrations of dresses back to the 16th century.  One day I want to do an 18th century dress (Faldbúningur), but that takes about 3 years, if one is quite diligent and I don't have the time right now.

I signed up for a course in sewing the shirt and the apron.  I started the 19th century shirt, which is made of a very fine linen (can also be cotton), but I can't find a linen thread here so I can't finish it.  I've almost finished sewing the apron, with thread from the fabric.  I just have to do buttonholes and slight finishing.  In the olden days it was either made from local wool, striped or checked, imported silk or, rarely, white linen.  I would love to weave the fabric for my apron, but then it also becomes tempting to spin the yarn for it and dye it myself.  So silk apron it is.  I have also started the knitted hat, which is most often done in black, but the older hats were more commonly blue and even red or green.  Since I didn't want black, I used the woad dyed alpaca from last summer, very happy to have found a worthy project for it.  I'm waiting for a course in sewing the very delicate embroidery for the corset, as well as a course in sewing an underskirt.  But the overskirt and the corset itself may have to wait a while.

This project is taking on a life of it's own.  It's my goal now to make a dress for July 19th which is my grandmothers birthday.  This year we will celebrate the centenary of her birth and I plan to finish some form of a national dress to wear that day.  It will undoubtedly deviate quite a bit from what is most often done, a lot of black, but it will be handmade and I will stay true to the handiwork and even more correct in terms of the colours I use since I plan to use mostly indigo dyed wool and a lot of white.  The white is not very traditional, but I don't care.  After all it will be summer.


Sombre colours

I bought this fantastic linen yarn on a cone. It was quite fine and I usually like chunky yarns to knit.  But I love linen and this was a...