It's here. Summer is gone and fall is here. The blustery winds and rain have arrived after an unusually good summer. I'm never prepared, really. There is always so much more that I wanted to get done this summer. Every year it's like that. But it's over in a blink of an eye. Now we can light candles in the evenings again and curl up on the sofa listening to the winds howl. Oh, well. There is something cozy about that too.
I bought the perfect thing for fall. I found this rya (also called smyrna) rug at the Good Shepherd (our local junk store). It's owner had only just started it and obviously put it away and given up on it. I love the colours, reds, yellows and oranges with purples, pinks, browns and blacks. And it came complete with all the yarns, the pattern and colour swatches. I only paid 15$ for it and now I'm all set for fall. I try to do one line in an evening. It's very calming and I don't have to remember anything. It's numbered and I just have to change the colours. I have no idea where I'm going to put it when I'm done, but that doesn't matter in the least. I have a piece of handiwork that will entertain me in the coming winter months and serve as a warm blanket while I work on it.
Not that I have no projects going. I'm still cleaning my eiderdown and there is a long way to go. I'm also dyeing yarn regularly, right now I have some Dyers Chamomile in the pot. But I haven't made soap in the longest time and I'm starting to miss that. So much so, that I'm even beginning to get ideas for new soaps to make. I guess I just might write a post about soapmaking soon.
I started this blog as a soap blog, but I have many other interests. Lately I have not made as many soaps as I used to, but I have become more interested in natural dyeing and old handiwork. You may also see posts about gardening, baking, DIY and anything else that takes my fancy.
Thursday, September 6, 2012
Thursday, August 30, 2012
Mushroom dyeing - Suillus luteus
I have been buying quite a few books about dyeing. Old books mostly. Some of them I have bought for a few dollars and one I even got for a few cents. I discovered that old out of print books can be found on the internet and many even on Amazon. So now I have a pile of books on dyeing, most in English but I've also acquired some in other languages. I even have one in Finish (a language which I absolutely do not understand, but I've used Google translate to help).
There is always something to learn from a new book, even if on occasion the lesson is mostly about how not to write a book on the subject. I was lucky enought to find a used book market on a recent trip to Copenhagen and found one book in Danish about plant dyes and another in Swedish about spinning wool and linen. Can't wait to read them.
It's mushroom collecting time and I've gone once with my mom to collect them. Although I only picked berries and let her take the mushrooms. There weren't that many of them of the right size for eating. As I understand it though, the bigger and more unappetizing, the better they are for dying.
I have mostly gotten beige and brown from mushrooms so far. The really exotic types that give purples, reds, greens and blues don't seem to grow here at all. But I was really pleased with the results I got from The Slippery Jack mushroom - Suillus luteus. My mom had dried quite a few very wet mushrooms in the oven. The liquid that dripped from them was a bright yellow so she gave it to me to experiment with.
It dyed a wonderful yellow colour, even unmordanted wool. When I make these experiments I always dye both unmordanted and mordanted wool and then I use modifiers to see if I can change the colour. I always try an acid and an alkaline soak and also iron water and copper water. The Suillus turned a very pretty orange in the washing soda bath and a paler yellow in the acid bath. The iron made it dark brown and the copper turned it a lighter brown. I love the fact that I didn't have to waste the mushrooms to use their colour and I will certainly go and look for some more after the next rain. I'm planning to knit a sweater with a pattern where I can use lots of different colours, all with natural dyes. I've harvested some of my home grown dye plants. The woad and the Japanese indigo are just incredibly fun to work with. To make a blue colour from green leaves. It's magic.
Tuesday, August 21, 2012
Enzyme cleaner - does it work?
I made enzyme cleaner. Way back in the beginning of March. And then again at the beginning of April. The recipe is very easy:
1 part brown sugar (I don't think it needs to brown)
3 parts citrus peel (or any other fruit peel, pinapple is supposed to really good)
10 parts water
Put some lemon and orange peel (or pineapple) into a 2 liter plastic bottle and then put in the sugar and water. Close the bottle and shake it to dissolve the sugar.
Let stand for 3 months and be careful to let off some of the gas that starts to develop in the bottle or it will explode. After the 3 months are up, strain and use by diluting 1:10 with water to clean most things. The first webpage where I saw this, The happy homemaker was really happy with the results and it seems so is everyone else, but I'm just not getting it.
I did everything according to the instructions and then I also did another batch using pineapple scraps and I know that pinapple is supposed to have a lot of enzymes and should work really well. I just decanted the pinapple cleaner. I had that standing from April 7 until Aug. 20 and it never developed any mold. It looks nice, it smells pretty similar to the lemon & orange peel one (almost like a plastic smell, does that sound right?) and I think it works just about the same. Which is to me: Not really. I really wished this to work although it annoys me, not to understand the chemistry, so if anyone can explain this I would be grateful. I have no idea what went wrong or if I'm just misunderstanding something.
I guess I can use this as an excuse to my sloppy housekeeping in the last few weeks, although perhaps a more truthful story would be the nice weather. We have had a record in nice weather, for more than 20 days in a row the temperature has reached 20°C (that's a whopping 68°F) somewhere in the country. But now we have rain and more rain so now I really need to find out why my enzyme cleaner doesn't really work because I don't have any excuses anymore. Or maybe it does work and I just have to let it sit for a while before I wipe it off. Does anyone know? Or even care? Maybe I shouldn't either.
1 part brown sugar (I don't think it needs to brown)
3 parts citrus peel (or any other fruit peel, pinapple is supposed to really good)
10 parts water
Put some lemon and orange peel (or pineapple) into a 2 liter plastic bottle and then put in the sugar and water. Close the bottle and shake it to dissolve the sugar.
Let stand for 3 months and be careful to let off some of the gas that starts to develop in the bottle or it will explode. After the 3 months are up, strain and use by diluting 1:10 with water to clean most things. The first webpage where I saw this, The happy homemaker was really happy with the results and it seems so is everyone else, but I'm just not getting it.
I did everything according to the instructions and then I also did another batch using pineapple scraps and I know that pinapple is supposed to have a lot of enzymes and should work really well. I just decanted the pinapple cleaner. I had that standing from April 7 until Aug. 20 and it never developed any mold. It looks nice, it smells pretty similar to the lemon & orange peel one (almost like a plastic smell, does that sound right?) and I think it works just about the same. Which is to me: Not really. I really wished this to work although it annoys me, not to understand the chemistry, so if anyone can explain this I would be grateful. I have no idea what went wrong or if I'm just misunderstanding something.
I guess I can use this as an excuse to my sloppy housekeeping in the last few weeks, although perhaps a more truthful story would be the nice weather. We have had a record in nice weather, for more than 20 days in a row the temperature has reached 20°C (that's a whopping 68°F) somewhere in the country. But now we have rain and more rain so now I really need to find out why my enzyme cleaner doesn't really work because I don't have any excuses anymore. Or maybe it does work and I just have to let it sit for a while before I wipe it off. Does anyone know? Or even care? Maybe I shouldn't either.
Monday, August 6, 2012
Eco dying - Tutorial, T-shirt makeover
What is needed is a piece of fabric, some string, a collection of leaves and flowers and a small branch from a tree or a bush, ideally slightly smaller than you largest pot. Since this dyeing is not done with harmful materials it is ok to use your regular pots, but should you decide to start to dye it is generally recommended to have a separate pot for that.
| Take an old T-shirt (or a brand new one if you want or any other piece of cloth for that matter, but not synthetic). I used a dropper to put some Iron water and Copper water spots on the fabric, but that is not necessary. And be aware that Copper water is poisonous so I do not suggest you use that. Making Iron water is easy though, just put some rusty object into a jar filled with a mix of two parts water and one part white vinegar (5%). Let the rusty objects sit there and disintegrate. The water will turn a rusty (naturally) orange colour in a few weeks. |
|
| Now go outside to your garden or the nearest park or wilderness and carefully snip off a few leaves and flowers that catch your fancy. Naturally, well known dye plants will give the most colour. In this shirt I used Geranium, Cherry leaves, Apple leaves, Euphorbia leaves (gives a great green colour) among others. Then you can start arranging the leaves and flowers on you fabric. Some leaves print really well, white others don't really come through, but sometimes act a a resist. |
|
| Then start to wrap up the fabric. |
|
| The size should be just slightly smaller than the size of the branch you are using. | |
| Wrap the fabric tightly around the branch. The tannins in the bark will act as a mordant to fix the colors to the fabric. If you have any rusted objects lying around, like nails, bottle caps, hairpins or anything like that, feel free to add those to you bundle. The iron will also act as a mordant and will produce gray and black colors and patterns in combination with the plant material. Alternatively use an iron pot and you'll get a gray colour. | |
| Now tie the bundle tightly with a piece of string. |
|
| Now put the bundle into hot water and simmer it for at least an hour or two. If your bundle is larger than the pot, just turn it a few times during the simmer. I used the left over dye water from an Avocado pit/skin dyeing experiment. But clear water can be used. |
|
| I let my bundle sit in the dye bath overnight. Some people steam their bundles. I've never done that. Simmering them in water works fine for me, but steaming is a possibility for those who have an easy time doing that. | |
| I let the bundle sit for a while in the sink before I unravelled it. I am not a patient person, so few hours is all I've ever managed. |
|
| The unravelling! There is no way to predict what comes out, really. I have started to recognize how some leaves print, but there are always so many factors that affect how this turns out. One thing for certain is that with rinsing, the colors will fade a bit. |
|
| My revamped T-shirt. The Avocado didn't really stick, but I got some really nice markings. I have done 4 T-'s so far and am still working on an off white sweater that got a small stain. I was going to trow it out, but decided to try and treat it to the plant experiment. It's sitting in my cast iron pot (great gray colour) and I'm going to let it sit for a few days to soak up all the iron. So far it looks very dark gray. I unravelled it a bit, but saw that the iron water hadn't penetrated the whole bundle, so I'm letting it sit for a bit longer. I can't wait so see what comes out. Also, the sweater is part synthetic so I'm curious to see if how the dye will take to a blend. I've only ever dyed cotton, wool and silk and synthetics don't accept natural dyes that well. But we'll see. |
|
Saturday, July 28, 2012
Dye-ing to tell you
Quite some time ago I saw India Flynt's book Eco Colour: Botanical Dyes for Beautiful Textiles in a bookstore. I was intrigued by it, but didn't buy it since I was traveling and the book is fairly large and cumbersome. And, besides I thought, I really don't like this mottled effect of muted colours. I like the vibrants clear colours of flowers and the rainbow.
But that changed. It really is amazing how ones taste does change when one starts do dye with natural materials. I have come to a new appreciation of greeny yellows, browns and grays. And my preference for evenly dyed yarn and fabric... Completely gone. I now love the mottled, splotsy (I guess that's not a word) effect that can be achieved with natural materials. I decided to try some eco dyeing the other day. I started with an old not-very-white-anymore-t-shirt and then progressed onto a silk scarf that I had bought especially to try to do some eco dying.
I loved the whole process. Picking leaves and flowers and arranging them onto the fabric, wondering which leaves would leave a mark and how they would look. Admiring the wonderful colours, knowing that the end result will be completely different from the original composition. Choosing a branch, wondering which wood would give what effect, and then rolling the fabric onto the chosen branch, tightly. Tying the whole thing into a tight bundle hoping that the branch would fit the largest pot, which of course it didn't since I didn't measure before I sawed it. I didn't steam, I boiled the whole lot. Wonder if the effect is different that way. Probably. Add rust water. Is that too much or too little? Have I ruined the whole thing? Then the difficult time to wait for a while. I've read some people wait for weeks and months. What are they made of? I waited an hour and it was difficult. And whooo! What fantastic result. I love the way the scarf turned out. Those wonderful patterns that I wasn't aware that I was creating. I really, really like the effect.

I also loved the t shirt immediately. Wore for dinner the same day. And also wore it work. And then proceeded to dye some more. The next one was confiscated by a daughter. That's a compliment, I'm sure. Then I gave her a few old t's to take on a camping trip around the country. She wants to gather plants where they stop to camp and arrange them onto the fabric and make a bundle which she'll boil when she gets a chance. Adding rusted nails and old twigs all adds to the final result. It'll be exciting to see what she comes up with since they are driving around the whole island and she will be picking plants in very different locations.
This is so easy to do and my shabby old t's look really respectable when they have been through this process. No longer gray and dingily, they look like works of art. I'm hooked. I almost threw out some of my old t shirts and now I'm Google-ing "t-shirts in bulk". I can't get enough of dyeing them. I run out to the garden and pick whatever takes my fancy and arrange it carefully. That part is tranquil and serene. Tying it up is fun, the the marks usually show and make some pattern. Then I have to wait to see what emerges. I have one waiting right now. I dyed that in avocado skins which gives a lovely dusty pink colour. Then I put leaves on it and boiled it for an two hours or so. I put some rust water on it and some copper water also (that is poisonous, but I'm careful) to get some effects. The rust water produces the grays and blacks, the copper water enhances some green colors from leaves. Both act as mordants, along with the tannins in the tree branch. But all very unpredictable in combination with the different leads and flowers.
I can't wait any longer. I'm unrolling the bundle. It's all excitedly mottled and splotsy (that should be a word even if it isn't) and I'm sure it's the best one yet.
But that changed. It really is amazing how ones taste does change when one starts do dye with natural materials. I have come to a new appreciation of greeny yellows, browns and grays. And my preference for evenly dyed yarn and fabric... Completely gone. I now love the mottled, splotsy (I guess that's not a word) effect that can be achieved with natural materials. I decided to try some eco dyeing the other day. I started with an old not-very-white-anymore-t-shirt and then progressed onto a silk scarf that I had bought especially to try to do some eco dying.
I loved the whole process. Picking leaves and flowers and arranging them onto the fabric, wondering which leaves would leave a mark and how they would look. Admiring the wonderful colours, knowing that the end result will be completely different from the original composition. Choosing a branch, wondering which wood would give what effect, and then rolling the fabric onto the chosen branch, tightly. Tying the whole thing into a tight bundle hoping that the branch would fit the largest pot, which of course it didn't since I didn't measure before I sawed it. I didn't steam, I boiled the whole lot. Wonder if the effect is different that way. Probably. Add rust water. Is that too much or too little? Have I ruined the whole thing? Then the difficult time to wait for a while. I've read some people wait for weeks and months. What are they made of? I waited an hour and it was difficult. And whooo! What fantastic result. I love the way the scarf turned out. Those wonderful patterns that I wasn't aware that I was creating. I really, really like the effect.
I also loved the t shirt immediately. Wore for dinner the same day. And also wore it work. And then proceeded to dye some more. The next one was confiscated by a daughter. That's a compliment, I'm sure. Then I gave her a few old t's to take on a camping trip around the country. She wants to gather plants where they stop to camp and arrange them onto the fabric and make a bundle which she'll boil when she gets a chance. Adding rusted nails and old twigs all adds to the final result. It'll be exciting to see what she comes up with since they are driving around the whole island and she will be picking plants in very different locations.
This is so easy to do and my shabby old t's look really respectable when they have been through this process. No longer gray and dingily, they look like works of art. I'm hooked. I almost threw out some of my old t shirts and now I'm Google-ing "t-shirts in bulk". I can't get enough of dyeing them. I run out to the garden and pick whatever takes my fancy and arrange it carefully. That part is tranquil and serene. Tying it up is fun, the the marks usually show and make some pattern. Then I have to wait to see what emerges. I have one waiting right now. I dyed that in avocado skins which gives a lovely dusty pink colour. Then I put leaves on it and boiled it for an two hours or so. I put some rust water on it and some copper water also (that is poisonous, but I'm careful) to get some effects. The rust water produces the grays and blacks, the copper water enhances some green colors from leaves. Both act as mordants, along with the tannins in the tree branch. But all very unpredictable in combination with the different leads and flowers.
I can't wait any longer. I'm unrolling the bundle. It's all excitedly mottled and splotsy (that should be a word even if it isn't) and I'm sure it's the best one yet.
Wednesday, July 18, 2012
The Bigger Picture
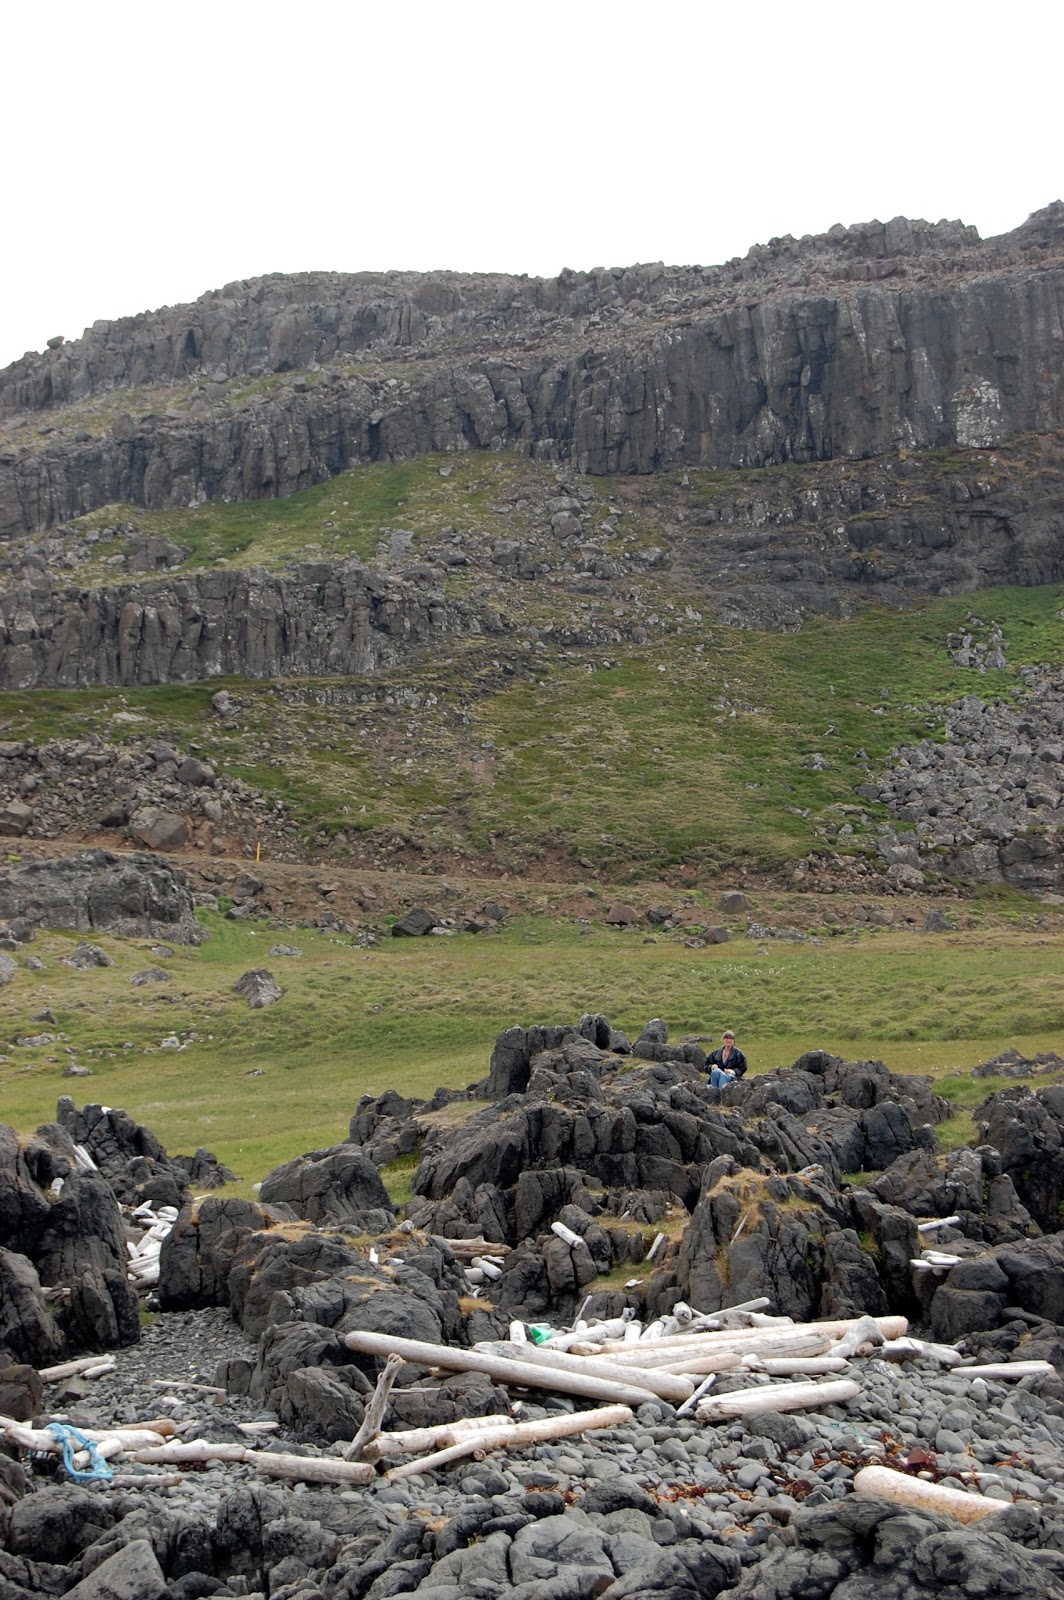
I went up to the north last weekend for a gathering-of-the-clan-thing. In this case it was the descendants of my fathers grandmother and grandfather on his mother's side that gathered at the old farm, Svanshóll (Swanhill) in Bjarnarfjörður (Bearfjord). The last time we were there was in 2006 when my father came with us to celebrate his fathers centenary. Later that year my father passed away, so that trip was very special.
I have been wanting to come back, so this opportunity was welcome. I wanted to go to spend some time in the fantastic landscape, look for lichens which I knew are abundant in that area and even gather some. And I did.
Saturday, July 7, 2012
Perfect and thick - Yoghurt revisited
It's been more the a year since I made my first yoghurt and I've been making it ever since. That is just about every week to ten days. The yoghurt that I make tastes somehow fresher than store-bought. I have never liked unflavoured yoghurt. It's always tasted way too sour, but when I make it myself I never sweeten it. I just mix a bit of honey or strawberry-honey mixture and I love the way the crisp sour taste mixes with the sweet honey and tart fruit.
I think I surprised everyone that I was so diligent about the yoghurt making and baking sourdough bread, which I also do every week or so. I think it's because I just feel so good after eating my own. I can't imagine being without it.
I've just started a new diet called GAPS. The whole idea is that our gut is damaged and lets through large molecules into the bloodstream which cause the body to make antibodies and also that the bacterial flora of the gut is not good, so that we have too many harmful bacteria in the gut and they make toxins which also get into the blood and they cause all sorts of problems. Neither grain nor dairy is allowed on this diet because they are hard to digest. The diet starts with meat broth, boiled meat and vegetables, cod liver oil, Probiotics and yoghurt for those who can tolerate it. Rather restrictive, but I'm prepared to try it. I am lucky enough to be able to use yoghurt from day one. Not only have I been eating yoghurt every day but I'm one of the lucky people who can digest lactose as are 95% of my country men. This ability is a genetic mutation about 8000 years old, known in peoples of northern Europe and eastern Afrika. So I have no plans to abandon dairy.
I have found a wealth of information on the internet about this diet and I particularly like this site, The Liberated Kitchen, where she has a page about the resources, for those who would like to know more. I have started this diet because I am really tired of arthritis pain in my hands and I think I need to try something to make it better (other than painkillers).
But back to yoghurt. The first time I made my own yoghurt I got a really good thick yogurt, so I thought, hey, this is easy and promptly made another batch that was very thin and runny. Then I had a batch that had tiny hard grains in it. So I thought I had better figure this out so that I could make the perfect batch every time. This is how I do it.
I always use 1.5 - 2 liters of full fat milk. For a while I experimented with adding cream to it and that produced very nice yoghurt, but it is more expensive. So full fat, pasteurized og homogenized (can't get it any other way) but not ultra heat treated. I would try fresh milk straight from the cow if I could. I put this in a pot and put it on full heat on the stove. I stir it pretty continuously as i monitor the heat with a thermometer. When it reaches 180 °F / 85 °C I turn down the heat and hold this temperature for at least 5 minutes. This is the best tip ever. This is what makes the yoghurt thick and creamy. Something about the heat and proteins, but the result is thicker yoghurt.
After holding this temperature for 5 minutes I plunge the pot into a bowl filled with ice cubes and water and stir the milk until it has cooled down to 110 °F / 42 °C. Then I pour almost all of the milk into a large jar. The small amount I pour into a glass and to this I add the yoghurt that I'm using as a starter. This is usually what is left of my own. Or, if I've been greedy, store bought fresh yoghurt. I mix it with the milk in the glass, about 2 - 3 tablespoons, and then pour it into the large jar. Then I mix the liquid in the jar by gently stirring.
I put the jar into my oven on a low setting and keep it overnight. I find that 10 hours works very well for me. Then I take it from the oven and put it in the refrigerator to cool down. When it is cold I use a knife to stir it well and it is ready to eat.
I used to think this was so much hassle to make. First I thought one would need a yoghurt maker. Not so. Wouldn't use one if I was given one. It is much easier to use a jar. Also I used to worry terribly about the exact temperature. But it's not that precise. I've heated the milk above the recommended temperature (although not to a boil) without any ill effects. The important thing is that the yogurt bacteria thrives at temperature between 100-110 °F / 38-43 °C. If it gets hotter the bacteria will die. If it gets colder the bacteria won't do it's job till it's warm again. So as long as one is careful about the temperature after the yoghurt is added, there is no problem.
I think I surprised everyone that I was so diligent about the yoghurt making and baking sourdough bread, which I also do every week or so. I think it's because I just feel so good after eating my own. I can't imagine being without it.
I've just started a new diet called GAPS. The whole idea is that our gut is damaged and lets through large molecules into the bloodstream which cause the body to make antibodies and also that the bacterial flora of the gut is not good, so that we have too many harmful bacteria in the gut and they make toxins which also get into the blood and they cause all sorts of problems. Neither grain nor dairy is allowed on this diet because they are hard to digest. The diet starts with meat broth, boiled meat and vegetables, cod liver oil, Probiotics and yoghurt for those who can tolerate it. Rather restrictive, but I'm prepared to try it. I am lucky enough to be able to use yoghurt from day one. Not only have I been eating yoghurt every day but I'm one of the lucky people who can digest lactose as are 95% of my country men. This ability is a genetic mutation about 8000 years old, known in peoples of northern Europe and eastern Afrika. So I have no plans to abandon dairy.
I have found a wealth of information on the internet about this diet and I particularly like this site, The Liberated Kitchen, where she has a page about the resources, for those who would like to know more. I have started this diet because I am really tired of arthritis pain in my hands and I think I need to try something to make it better (other than painkillers).
But back to yoghurt. The first time I made my own yoghurt I got a really good thick yogurt, so I thought, hey, this is easy and promptly made another batch that was very thin and runny. Then I had a batch that had tiny hard grains in it. So I thought I had better figure this out so that I could make the perfect batch every time. This is how I do it.
I always use 1.5 - 2 liters of full fat milk. For a while I experimented with adding cream to it and that produced very nice yoghurt, but it is more expensive. So full fat, pasteurized og homogenized (can't get it any other way) but not ultra heat treated. I would try fresh milk straight from the cow if I could. I put this in a pot and put it on full heat on the stove. I stir it pretty continuously as i monitor the heat with a thermometer. When it reaches 180 °F / 85 °C I turn down the heat and hold this temperature for at least 5 minutes. This is the best tip ever. This is what makes the yoghurt thick and creamy. Something about the heat and proteins, but the result is thicker yoghurt.
After holding this temperature for 5 minutes I plunge the pot into a bowl filled with ice cubes and water and stir the milk until it has cooled down to 110 °F / 42 °C. Then I pour almost all of the milk into a large jar. The small amount I pour into a glass and to this I add the yoghurt that I'm using as a starter. This is usually what is left of my own. Or, if I've been greedy, store bought fresh yoghurt. I mix it with the milk in the glass, about 2 - 3 tablespoons, and then pour it into the large jar. Then I mix the liquid in the jar by gently stirring.
I put the jar into my oven on a low setting and keep it overnight. I find that 10 hours works very well for me. Then I take it from the oven and put it in the refrigerator to cool down. When it is cold I use a knife to stir it well and it is ready to eat.
I used to think this was so much hassle to make. First I thought one would need a yoghurt maker. Not so. Wouldn't use one if I was given one. It is much easier to use a jar. Also I used to worry terribly about the exact temperature. But it's not that precise. I've heated the milk above the recommended temperature (although not to a boil) without any ill effects. The important thing is that the yogurt bacteria thrives at temperature between 100-110 °F / 38-43 °C. If it gets hotter the bacteria will die. If it gets colder the bacteria won't do it's job till it's warm again. So as long as one is careful about the temperature after the yoghurt is added, there is no problem.
Thursday, June 28, 2012
Fruit Rolls
I have always hated to throw out any left over mash from making fruit or rhubarb gel, syrup or drink so I was quite happy to find a recipe for fruit rolls. I jumped on the chance to make some, first I used the left over mash from making Red Currant (Ribes) jelly and then I tried to use Rhubarb mash. I liked the former much better, it tasted really good, fresh an fruity.
They are relatively easy to make. I used about 1 liter (4 cups) of fruit mash for one baking sheet. For the Redcurrant mash I put the mash into a pot and pour a little less than 1 cup of water over it. I then added sugar to taste. Since I was using leftovers from jelly making, the mash was already slightly sweet, so I didn't need a lot of additional sugar. Just start with 1 tablespoon and let that dissolve at a low heat and then taste it to see if it needs more sugar. I've seen recipes without sugar, so I guess it all depends on taste. I also like to squeeze a little lemon juice in there to give a little tang to the taste. I let this simmer for 10-20 minutes making sure all the fruit was well mashed and the whole thing has thickened. It's good to give it a last taste to make sure that it's neither too sweet nor too sour. Then I strained it. I did that with the Red Currants because I had all the little branches and stuff in there. When I used Rhubarb mash I didn't strain, but that makes more of a cloudy fruit roll. It can be good to use a stick blender on the fruit mash to make sure it is well pureed.
This is then poured on a baking sheet lined with baking paper or silicone. The thickness is 1/2 to 1cm (1/4 to 1/2 inch) thick. This is put in the oven on a low heat 60C (140F) until it has dried and can be peeled off. This can easily be overnight in the oven on that heat. I don't have a dehydrator, but this would be perfect for that.
When I do the Rhubarb mash fruit roll I also add an apple to give it more substance. In fact most fruit can be used and I think Blueberries would also make a very nice fruit roll and those probably wouldn't need any additional sugar.
They are relatively easy to make. I used about 1 liter (4 cups) of fruit mash for one baking sheet. For the Redcurrant mash I put the mash into a pot and pour a little less than 1 cup of water over it. I then added sugar to taste. Since I was using leftovers from jelly making, the mash was already slightly sweet, so I didn't need a lot of additional sugar. Just start with 1 tablespoon and let that dissolve at a low heat and then taste it to see if it needs more sugar. I've seen recipes without sugar, so I guess it all depends on taste. I also like to squeeze a little lemon juice in there to give a little tang to the taste. I let this simmer for 10-20 minutes making sure all the fruit was well mashed and the whole thing has thickened. It's good to give it a last taste to make sure that it's neither too sweet nor too sour. Then I strained it. I did that with the Red Currants because I had all the little branches and stuff in there. When I used Rhubarb mash I didn't strain, but that makes more of a cloudy fruit roll. It can be good to use a stick blender on the fruit mash to make sure it is well pureed.
This is then poured on a baking sheet lined with baking paper or silicone. The thickness is 1/2 to 1cm (1/4 to 1/2 inch) thick. This is put in the oven on a low heat 60C (140F) until it has dried and can be peeled off. This can easily be overnight in the oven on that heat. I don't have a dehydrator, but this would be perfect for that.
When I do the Rhubarb mash fruit roll I also add an apple to give it more substance. In fact most fruit can be used and I think Blueberries would also make a very nice fruit roll and those probably wouldn't need any additional sugar.
Wednesday, June 20, 2012
More Shabby than Chic - The Allotment
I've been spending some time in the Allotment garden lately. I managed to get some timber last year to make a raised bed and then I found some more this spring. They may not be the prettiest raised beds, but I've done my best to compensate by decorating a little bit. To be truthful, I'm a lazy gardener. I've always believed that gardening should be fun and not a chore. One part of that is to be able to sit down, look over your work and contemplate the next steps, while sipping a cold drink and munching on something chocolate.
One of the first things that I did when I got the Allotment was to scrounge a few pallets to make a deck of sorts. I stapled some dark material on the underside so that weeds wouldn't get through and then I put some old deck chairs on there. The deck chairs were nice, but my mom couldn't use them, she chouldn't get up. So I tried to find a pretty table for next to nothing, but just found a battered, ugly Ikea one, but it had to do. My mom had bought a folding chair and I brought one of mine that wasn't in use at the moment. I think I may need to put a tablecloth on that table and then the whole setup will be very nice.
When my husband and I were clearing out the garage the other day (I didn't actually throw anything away :) I had to do something with this monstrosity of a candle chandelier that had been hanging there (and regularly falling down) on a nail. It was left over from the garden decorations for the wedding and I didn't have the heart to throw it out. It really is kind of cute, but I don't have any place for it at home. The perfect solution, of course, was to take it down to the Allotment and hang it in a nearby tree. Just to make things a bit more homey. I would have loved to be able to build a shed, but the Allotments aren't big enough for that and we don't have permission for it anyway. So I'm doing the next best thing: Decorating nature.
I also do some more serious gardening. I spent the national holiday down there building a compost heap out of pallets and wire hangers. It actually took all of fifteen minutes to put it together. The rest of the time was spent cutting up perennial weeds (minus roots) and shoveling shit (sorry...manure). And then watering everything and covering it, hoping to start a turbo compost factory. And I dug up a lot of weeds, some of which I'm going to use for dye. And then I watered the plants. We have had a long dry spell with sun. It's been wonderful to have to water. Sometimes June is very wet.
I allocated a part of the space to some dye plants that I sowed this spring. I have japanese indigo, woad and weld and madder and one rather lanky coreopsis. I should sow some more. I also need to sow a bit more salad and stuff. I always make the mistake of not sowing regularly. But lettuce, spinach, radishes and even beetroots can be sown quite late and it's often better to sow a little every week or two than to sow a lot at one time. Or so I prefer to think when I'm running a bit late with everything.
Of course I could buy new things for the Allotment, but there is something extremely satisfying in reusing stuff that is destined for a landfill. And, please, if anyone knows of a good way to use wire hangers, pass it on. I really hate to throw them out but I'm not ready to iron his shirts either.
I also do some more serious gardening. I spent the national holiday down there building a compost heap out of pallets and wire hangers. It actually took all of fifteen minutes to put it together. The rest of the time was spent cutting up perennial weeds (minus roots) and shoveling shit (sorry...manure). And then watering everything and covering it, hoping to start a turbo compost factory. And I dug up a lot of weeds, some of which I'm going to use for dye. And then I watered the plants. We have had a long dry spell with sun. It's been wonderful to have to water. Sometimes June is very wet.
I allocated a part of the space to some dye plants that I sowed this spring. I have japanese indigo, woad and weld and madder and one rather lanky coreopsis. I should sow some more. I also need to sow a bit more salad and stuff. I always make the mistake of not sowing regularly. But lettuce, spinach, radishes and even beetroots can be sown quite late and it's often better to sow a little every week or two than to sow a lot at one time. Or so I prefer to think when I'm running a bit late with everything.
Of course I could buy new things for the Allotment, but there is something extremely satisfying in reusing stuff that is destined for a landfill. And, please, if anyone knows of a good way to use wire hangers, pass it on. I really hate to throw them out but I'm not ready to iron his shirts either.
Friday, June 15, 2012
The Elusive Green
I love the colour green. Didn't realize it until quite recently, well, a few years back. If asked I would have said red was my favorite colour. I don't wear green much, but when we bought our home eleven years ago all the windows, doors, fences and roof were a dark green colour. I guess that's when I discovered that I like the colour. Then I bought green drapes for the bedroom. Mostly because they were on sale and that was the only colour available. And I like those green drapes in the bedroom. They give a nice green glow into the bedroom in summer. With the nights so light, it's an advantage to tone the bright light down to a calming green.
I thought I had found the solution to the problem of getting a green colour naturally in soaps. It is one of the most difficult one to get from plants, both in soap and as a textile dye. Which is counterintuitive since most plants are green, so what happens to all the green? Well, it turns either yellow or brown because the Chlorophyll is not water-soluble and therefore can't be extracted in a water bath. And furthermore, as I understand it, it does fade even if it is used in it's oil soluble form as a soap colour. Apparently Chlorophyll is a combination of Chlorophyll a and Chlorophyll b and the a is a good dye and can be bought and used in soap.
I thought I had found a shortcut when I was given some very green tablets that were to be used as a nutritional supplement. No way was I going to eat those pretty green things. I had to try them in a soap. Well, you've guessed it. It really was a nice, nice green for a little while and then it faded. I knew that! Of course it faded. I really knew that was going to happen. It always does. I just have to give up this naive hope that somehow I will find a perfect green that says green and doesn't turn olive and brown, or disappears.
But the soap was the Rosemary shampoo bar, slightly changed.
Olive oil 40% 280g / 9.9 oz
Coconut oil 30% 210g / 7.4 oz
Castor oil 20% 140g / 4.9 oz
Sunflower oil 10% 70g / 2.5 oz
Water 30% 210g / 7.4 oz
Lye 99g / 3.5 oz
3% SF.
I added a lot of Rosemary essential oil and shredded some soap on top to make it slightly more interesting, but it didn't really work. I used too fine a grater and I like the look better without, but now I know that. It has been curing for quite a while, actually 3 months now, but I finally tried it and it has a very strong and refreshing smell, a nice generous lather lather and my hair loved it. I also really liked the first recipe, but this one may be an improvement, if only slight. I probably needed more of the green tablets to give a strong lasting colour. As it it the soap is a yellow green that's not really special. But I'm getting ready to start dying yarn again. I'm going to do it very methodically this time and I'm starting with one of my favorite weeds, Rumex.
I thought I had found the solution to the problem of getting a green colour naturally in soaps. It is one of the most difficult one to get from plants, both in soap and as a textile dye. Which is counterintuitive since most plants are green, so what happens to all the green? Well, it turns either yellow or brown because the Chlorophyll is not water-soluble and therefore can't be extracted in a water bath. And furthermore, as I understand it, it does fade even if it is used in it's oil soluble form as a soap colour. Apparently Chlorophyll is a combination of Chlorophyll a and Chlorophyll b and the a is a good dye and can be bought and used in soap.
I thought I had found a shortcut when I was given some very green tablets that were to be used as a nutritional supplement. No way was I going to eat those pretty green things. I had to try them in a soap. Well, you've guessed it. It really was a nice, nice green for a little while and then it faded. I knew that! Of course it faded. I really knew that was going to happen. It always does. I just have to give up this naive hope that somehow I will find a perfect green that says green and doesn't turn olive and brown, or disappears.
But the soap was the Rosemary shampoo bar, slightly changed.Olive oil 40% 280g / 9.9 oz
Coconut oil 30% 210g / 7.4 oz
Castor oil 20% 140g / 4.9 oz
Sunflower oil 10% 70g / 2.5 oz
Water 30% 210g / 7.4 oz
Lye 99g / 3.5 oz
3% SF.
I added a lot of Rosemary essential oil and shredded some soap on top to make it slightly more interesting, but it didn't really work. I used too fine a grater and I like the look better without, but now I know that. It has been curing for quite a while, actually 3 months now, but I finally tried it and it has a very strong and refreshing smell, a nice generous lather lather and my hair loved it. I also really liked the first recipe, but this one may be an improvement, if only slight. I probably needed more of the green tablets to give a strong lasting colour. As it it the soap is a yellow green that's not really special. But I'm getting ready to start dying yarn again. I'm going to do it very methodically this time and I'm starting with one of my favorite weeds, Rumex.
Monday, June 4, 2012
It's Rhubarb time again
I have been making everything Rhubarb in this past week. My Rhubarb plants are doing so well, probably because I covered them in loads of well rotted manure last fall and gave them some seaweed as well. They are growing like maniacs, which is nice because I didn't expect to be able to get any crop this year since it's only been two years since I got them and I even replanted them last summer.
Rhubarb rewards it's owner handsomely if treated properly. It's not very complicated. It should be divided every 10-15 years, or when it stops being productive. It's a big plant and it needs plenty of nutrients. Manure is perfect, or some other form of organic fertilizer like chicken manure and seaweed.
There are many cultivars of Rhubarb, some are completely red through the stalks, others have red on the outside of the stalks and then some are completely green. The reds cultivars tend be give less crop than the others. The taste is also different between the cultivars and apparently is is malic acid that determines the taste, if there is too little it tastes of little, and if there is too much it is too sour. There is no correlation between the colour of the stalks and the amount of malic acid in the Rhubarb.
This year I have already made Rhubarb syrup, Rhubarb heels, Rhubarb drink and Rhubarb muffins. And of course Rhubarb soap! I wanted to try to make a gradient colour with Rhubarb oil. Maybe an Ombré type effect. I didn't quite succeed, its more stripes than Ombré, but it's nice anyway and I had fun.
I just eyeballed the amounts of Rhubarb oil (chop up some pieces of root into oil of your choise and let it infuse until you see a good colour) into the soap, so it wasn't very scientific, but the recipe is here:
Olive oil 49% 360g / 13oz (out of this 20g was Rhubarb root infused)
Coconut oil 25% 190g / 6.7oz
Rapeseed oil 17% 107g / 3.7oz
Cocoa butter 9% 70g / 2.5oz
Castor oil 2% 14g / 0.5oz
Water 33% 250g / 8.7oz
Lye 106g / 3.7 oz
I divided the soap into four approx. 200g /7oz each and colored the first part with about 2 tablespoons of Rhubarb oil. The second with just over one tablespoon. The thirds with about half a tablespoon and the last with about a teaspoon. I tried to pour very evenly, over a spatula, and slammed the mold down to even it, but there are still valleys in the colors bands. I put the soap into a cold oven when it started to gel, because I wanted it to gel evenly and it seems to have done just that.
The intensity of the colour surprised me a little bit. The darkest layer is really dark red. Quite beautiful and a blueish tint to it. The cut surfaces are more of a yellow red, but they turn more blue as the soap ages. The scent was a combo of Rosewood and Rose Geranium and it smells lovely. I still leave a lot of Rubarb left to harves and I just may need to try some of the hair colour recipes next. On myself. That could be interesting...
Rhubarb rewards it's owner handsomely if treated properly. It's not very complicated. It should be divided every 10-15 years, or when it stops being productive. It's a big plant and it needs plenty of nutrients. Manure is perfect, or some other form of organic fertilizer like chicken manure and seaweed.
There are many cultivars of Rhubarb, some are completely red through the stalks, others have red on the outside of the stalks and then some are completely green. The reds cultivars tend be give less crop than the others. The taste is also different between the cultivars and apparently is is malic acid that determines the taste, if there is too little it tastes of little, and if there is too much it is too sour. There is no correlation between the colour of the stalks and the amount of malic acid in the Rhubarb.
This year I have already made Rhubarb syrup, Rhubarb heels, Rhubarb drink and Rhubarb muffins. And of course Rhubarb soap! I wanted to try to make a gradient colour with Rhubarb oil. Maybe an Ombré type effect. I didn't quite succeed, its more stripes than Ombré, but it's nice anyway and I had fun.
I just eyeballed the amounts of Rhubarb oil (chop up some pieces of root into oil of your choise and let it infuse until you see a good colour) into the soap, so it wasn't very scientific, but the recipe is here:
Olive oil 49% 360g / 13oz (out of this 20g was Rhubarb root infused)
Coconut oil 25% 190g / 6.7oz
Rapeseed oil 17% 107g / 3.7oz
Cocoa butter 9% 70g / 2.5oz
Castor oil 2% 14g / 0.5oz
Water 33% 250g / 8.7oz
Lye 106g / 3.7 oz
I divided the soap into four approx. 200g /7oz each and colored the first part with about 2 tablespoons of Rhubarb oil. The second with just over one tablespoon. The thirds with about half a tablespoon and the last with about a teaspoon. I tried to pour very evenly, over a spatula, and slammed the mold down to even it, but there are still valleys in the colors bands. I put the soap into a cold oven when it started to gel, because I wanted it to gel evenly and it seems to have done just that.
The intensity of the colour surprised me a little bit. The darkest layer is really dark red. Quite beautiful and a blueish tint to it. The cut surfaces are more of a yellow red, but they turn more blue as the soap ages. The scent was a combo of Rosewood and Rose Geranium and it smells lovely. I still leave a lot of Rubarb left to harves and I just may need to try some of the hair colour recipes next. On myself. That could be interesting...
Subscribe to:
Posts (Atom)
Sombre colours
I bought this fantastic linen yarn on a cone. It was quite fine and I usually like chunky yarns to knit. But I love linen and this was a...
-
There is a saying in Icelandic that to have a choice is to be in pain. I felt that way when it was time to make all the choices necessary...
-
I've been meaning to get some potassium hydroxide to make liquid soap. I would like to make my own dishwashing liquid and also a liq...